Install tmux on MacOS and Basics Commands for Beginners
Learn how to install tmux on MacOS and discover essential commands for beginners. Boost your productivity with this comprehensive guide to terminal multiplexing.

Looking to install tmux on MacOS and get started with the basics commands for beginners? You’re in the right place! Tmux, short for terminal multiplexer, is a powerful tool that allows you to manage multiple terminal sessions from a single screen, perfect for multitasking and organizing your workflow. In this guide, we’ll walk you through the simple steps to install tmux on your Mac and introduce you to some basic commands to help you get started.
What is tmux?
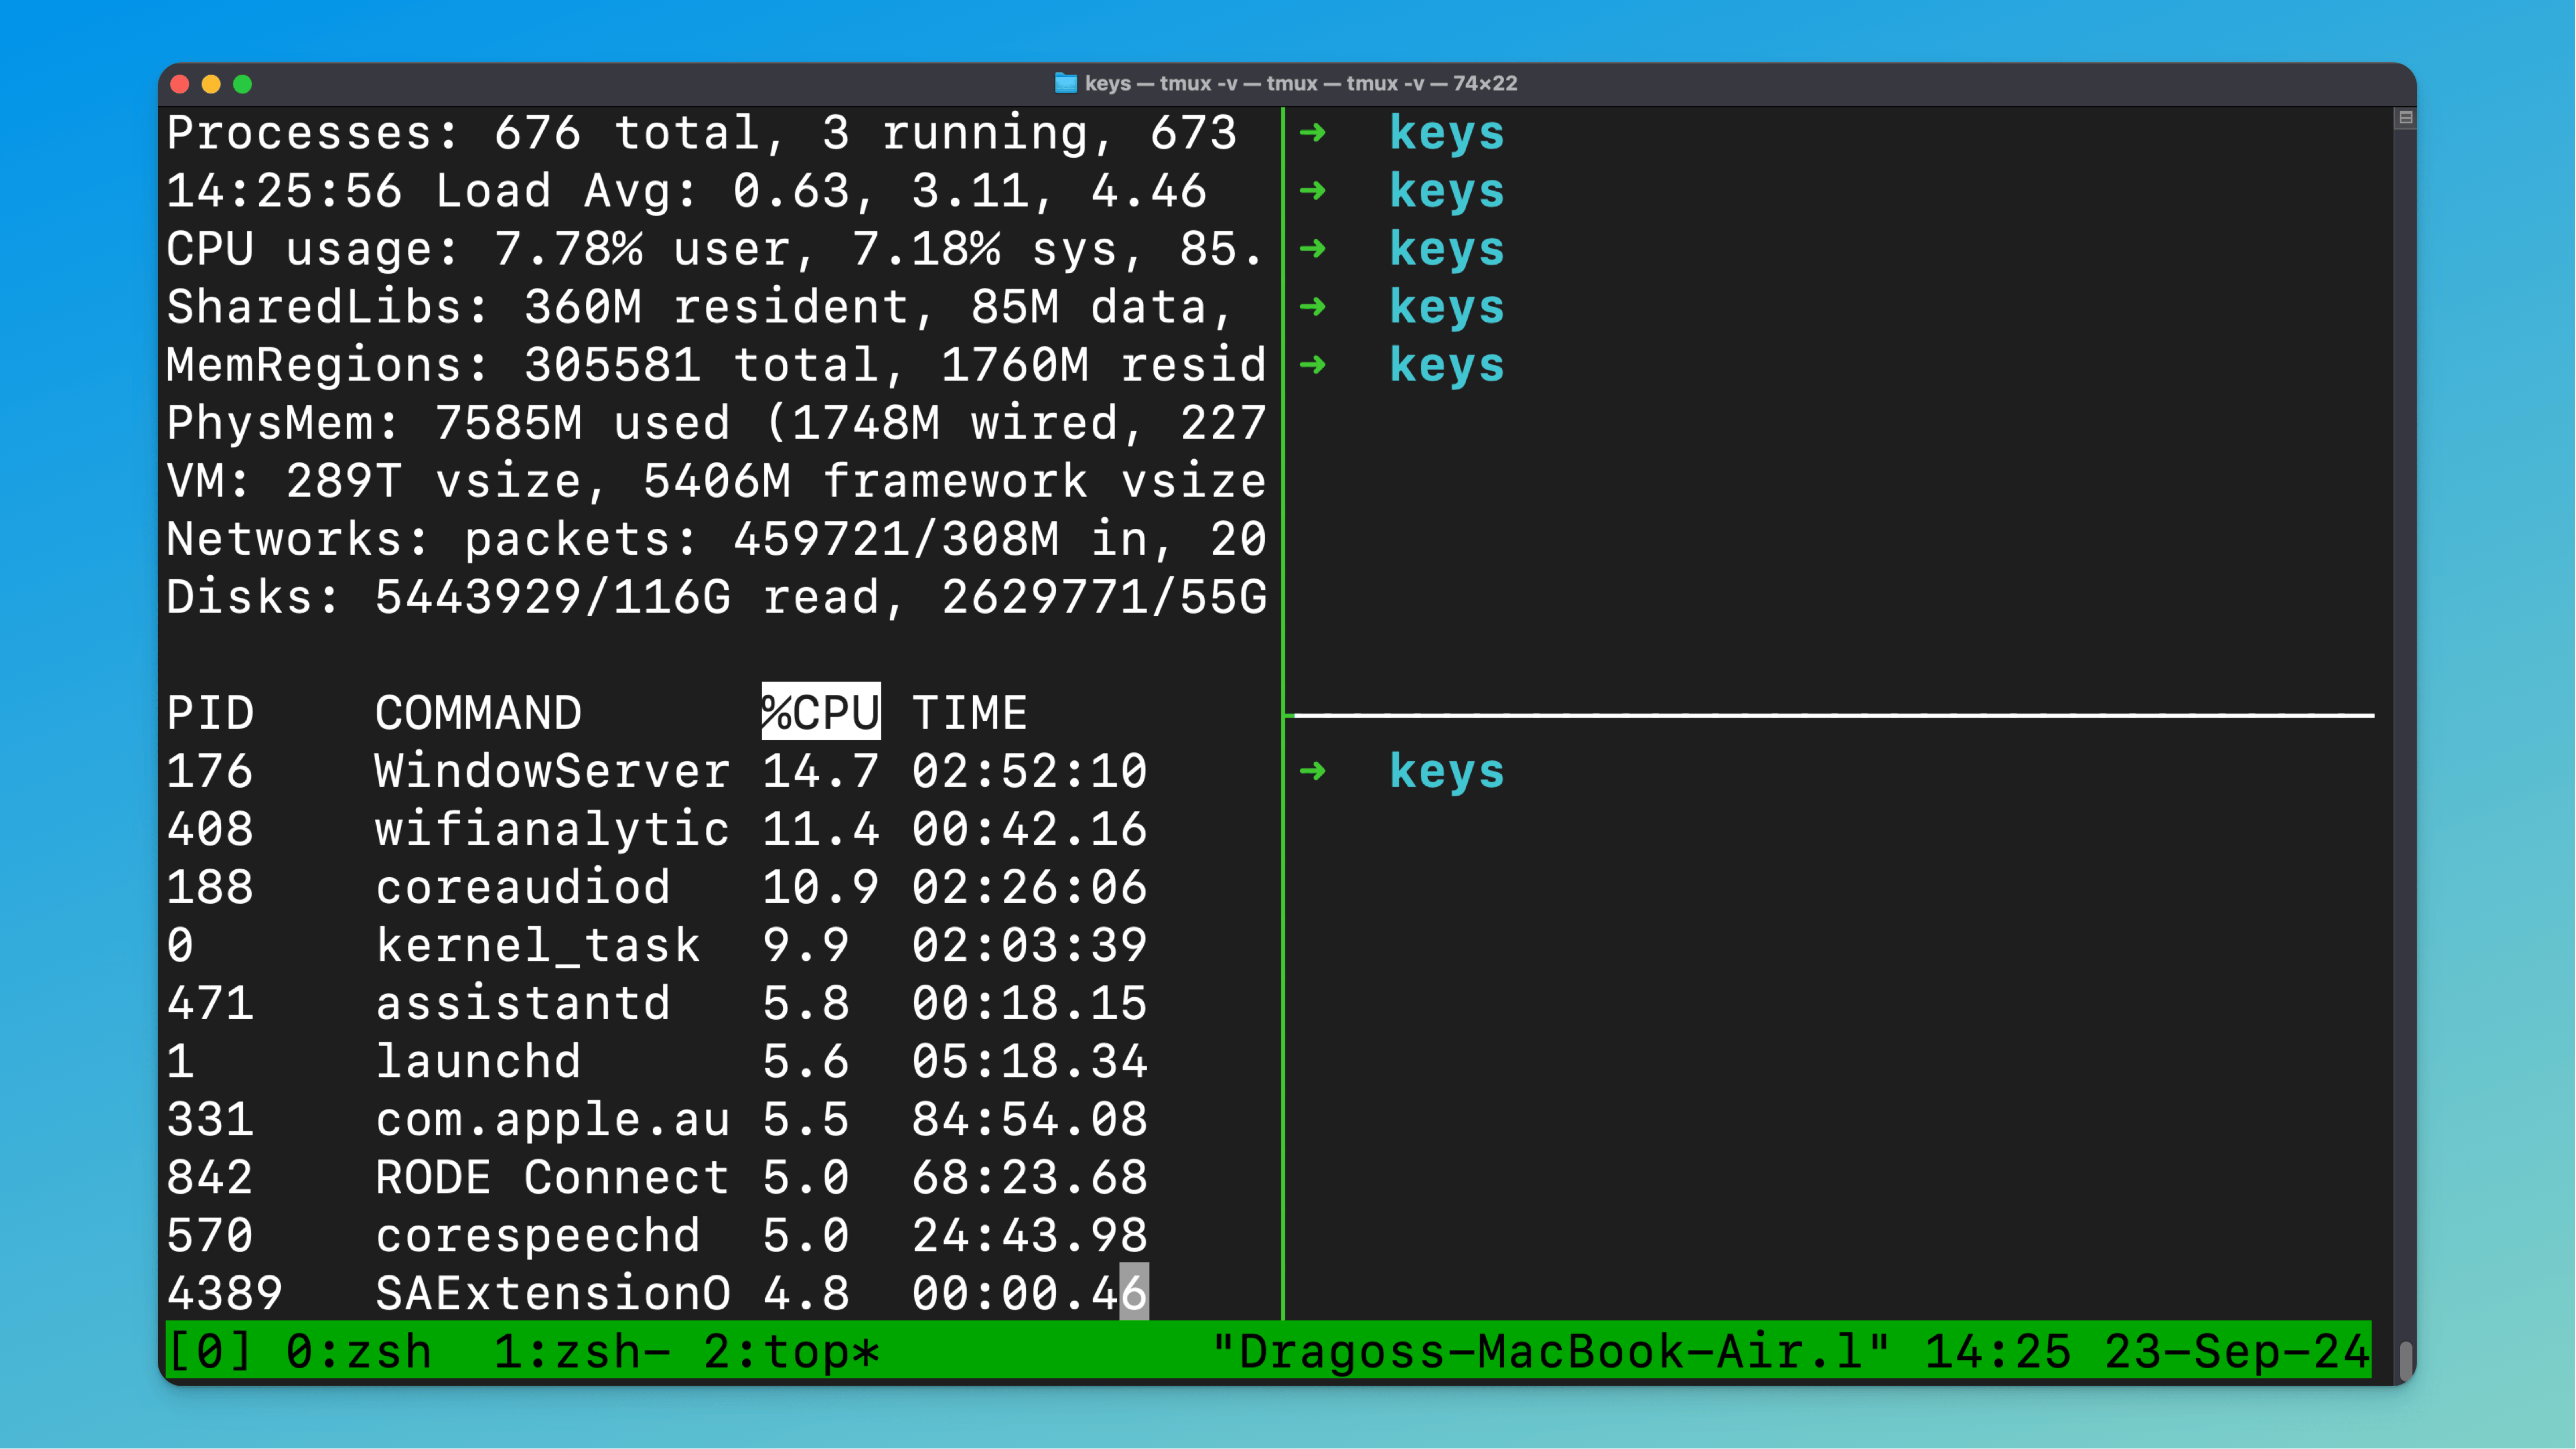
tmux, short for “terminal multiplexer,” is a powerful and versatile tool for managing multiple terminal sessions within a single window. It allows users to create, access, and control numerous terminal sessions from a single screen, enhancing productivity and streamlining workflow for developers, system administrators, and power users.
For a nice Mac terminal you can also check Maximize Efficiency: Integrating Wezterm, Zoxide, and Tmux for the Perfect Mac Terminal
Key features of tmux include:
-
Session Management: tmux lets you create multiple sessions, each containing one or more windows. You can detach from these sessions and reattach later, even from a different computer.
-
Window Splitting: Within a session, you can split your terminal window into multiple panes, both horizontally and vertically. This allows you to view and interact with multiple terminal instances simultaneously.
-
Persistence: tmux sessions continue running in the background even if you close your terminal emulator or disconnect from SSH. This is particularly useful for long-running processes or when working on remote servers.
-
Customization: tmux is highly configurable, allowing users to customize key bindings, appearance, and behavior to suit their preferences.
-
Pair Programming: tmux facilitates collaborative work by allowing multiple users to attach to the same session, making it an excellent tool for pair programming or remote troubleshooting.
For beginners, tmux might seem complex at first, but its benefits become apparent as you start using it regularly. It’s especially valuable for:
- Managing multiple tasks in a single terminal window
- Keeping processes running even when you’re disconnected
- Organizing your workspace efficiently
- Improving productivity in command-line environments
As we progress through this guide, you’ll learn how to install tmux on macOS and master its basic commands, setting you on the path to becoming a more efficient terminal user.
Getting Started with tmux
Before diving into tmux commands, let’s first install it on your macOS system. The process is straightforward, especially if you’re using a package manager.
Install tmux on macOS
There are two popular methods to install tmux on macOS: using Homebrew or MacPorts. We’ll focus on the Homebrew method as it’s widely used and easy to set up.
-
Install Homebrew (if not already installed): If you don’t have Homebrew installed, open Terminal and run this command:
/bin/bash -c "$(curl -fsSL https://raw.githubusercontent.com/Homebrew/install/HEAD/install.sh)"Follow the on-screen instructions to complete the installation.
-
Install tmux using Homebrew: Once Homebrew is installed, you can easily install tmux by running:
brew install tmuxHomebrew will download and install tmux along with any necessary dependencies.
-
Verify the installation: After the installation completes, verify that tmux is installed correctly by checking its version:
tmux -VThis command should display the installed version of tmux.
Table: tmux Installation Commands
| Action | Command |
|---|---|
| Install Homebrew | /bin/bash -c "$(curl -fsSL https://raw.githubusercontent.com/Homebrew/install/HEAD/install.sh)" |
| Install tmux | brew install tmux |
| Verify installation | tmux -V |
That’s it! You now have tmux installed on your macOS system. If you encounter any issues during installation, make sure your system is up to date and that you have the necessary permissions to install software.
With tmux now installed, you’re ready to start exploring its features and commands. In the next sections, we’ll cover how to start your first tmux session and navigate its basic functions.
Start Your First tmux Session
Now that tmux is installed, let’s explore how to start and manage sessions. These basic operations will help you get comfortable with tmux’s functionality.
Start session
To start a new tmux session:
tmuxThis command creates a new session with a default name.
Start Session with a session name
To start a new session with a specific name:
tmux new -s session_nameReplace session_name with your desired name. This makes it easier to identify and reattach to specific sessions later.
Sharing a tmux session
To allow another user to attach to your session (useful for pair programming):
- Start a session as usual.
- The other user can attach to your session using:
Both users will now be able to view and interact with the same session.tmux attach -t session_name
Attach Session
To reattach to an existing session:
tmux attach -t session_nameIf you don’t specify a session name, it will attach to the most recently used session.
Detach Session
To detach from a session without closing it:
- Press the tmux prefix key combination:
Ctrl+b - Then press
d
This leaves the session running in the background.
Exit Session
To completely exit and close a session:
- Type
exitin the tmux window, or - Press the tmux prefix (
Ctrl+b) followed by&, then confirm withy
Table: Basic tmux Session Commands
| Action | Command |
|---|---|
| Start new session | tmux |
| Start named session | tmux new -s session_name |
| Attach to session | tmux attach -t session_name |
| List sessions | tmux ls |
| Detach from session | Ctrl+b then d |
| Exit session | exit or Ctrl+b then & |
Remember, the prefix key Ctrl+b is crucial in tmux. It signals to tmux that the next key pressed is a command, not regular input.
These basic session management commands will get you started with tmux. As you become more comfortable, you’ll find that tmux offers much more powerful features for managing your terminal sessions efficiently.
Tmux Panes
Panes are one of tmux’s most powerful features, allowing you to divide a single window into multiple sections, each running its own shell or command.
Splitting Panes

To split panes, you’ll use the tmux prefix (Ctrl+b) followed by a specific key:
- Split vertically (left and right):
Ctrl+b % - Split horizontally (top and bottom):
Ctrl+b "
You can continue splitting existing panes to create complex layouts.
Navigating Panes
To move between panes:
- Move to the next pane:
Ctrl+b o - Move to a specific pane by direction:
Use the arrow keys (↑, ↓, ←, →) to move in that direction.Ctrl+b <arrow key>
Closing Panes
To close the current pane:
- Type
exitin the pane, or - Use the key combination:
This will prompt for confirmation before closing the pane.Ctrl+b x
tmux resize pane
Resizing panes can be done using the prefix followed by specific keys:
- Enter resize mode:
Then typeCtrl+b :resize-panefollowed by a direction flag:-U(up)-D(down)-L(left)-R(right)
For example, to resize the current pane up by 5 cells:
Ctrl+b :
resize-pane -U 5
Alternatively, you can use these key combinations for interactive resizing:
Ctrl+b Ctrl+<arrow key>Hold down Ctrl and press the arrow keys to resize in that direction.
Table: Tmux Pane Commands
| Action | Command |
|---|---|
| Split vertically | Ctrl+b % |
| Split horizontally | Ctrl+b " |
| Navigate to next pane | Ctrl+b o |
| Navigate by direction | Ctrl+b <arrow key> |
| Close current pane | Ctrl+b x or exit |
| Resize mode | Ctrl+b : then resize-pane -[U/D/L/R] <number> |
| Interactive resize | Ctrl+b Ctrl+<arrow key> |
Remember, you can always use Ctrl+b ? to view a list of all tmux key bindings if you forget any commands.
Working with panes allows you to efficiently manage multiple terminal instances within a single window, greatly enhancing your productivity in the command line environment.
Changing the Look of tmux
Customizing tmux’s appearance can make your terminal experience more enjoyable and productive. Here are some ways to change the look of tmux:
1. Customize the Status Bar
The status bar is a key visual element in tmux. You can modify its appearance in your tmux configuration file (~/.tmux.conf).
-
Change status bar color:
set -g status-style bg=black,fg=white -
Change the status bar position (top or bottom):
set -g status-position top -
Customize status bar content:
set -g status-left "[Session: #S] "
set -g status-right "%H:%M %d-%b-%y"
2. Window and Pane Styling
-
Change the active/inactive window colors:
set -g window-status-current-style bg=yellow,fg=black set -g window-status-style bg=green,fg=black -
Set pane borders:
set -g pane-border-style fg=green
set -g pane-active-border-style fg=yellow
3. Enable Mouse Support
For easier navigation and resizing:
set -g mouse on4. Change the Prefix Key
If you find Ctrl+b awkward, you can change it. For example, to change it to Ctrl+a:
unbind C-b
set-option -g prefix C-a
bind-key C-a send-prefix
5. Use a Theme
Instead of manually configuring everything, you can use pre-made themes. One popular option is to use the Tmux Plugin Manager (TPM) to install themes.
-
Install TPM:
git clone https://github.com/tmux-plugins/tpm ~/.tmux/plugins/tpm -
Add this to your
~/.tmux.conf:set -g @plugin 'tmux-plugins/tpm' set -g @plugin 'jimeh/tmux-themepack' set -g @themepack 'powerline/default/cyan' run '~/.tmux/plugins/tpm/tpm' -
Reload tmux configuration:
tmux source ~/.tmux.conf -
Install plugins: Press
prefix+I(capital i) to fetch the plugin.
Table: Common tmux Customization Commands
| Customization | Command in ~/.tmux.conf |
|---|---|
| Status bar color | set -g status-style bg=color,fg=color |
| Status bar position | set -g status-position [top/bottom] |
| Window color (active) | set -g window-status-current-style bg=color,fg=color |
| Pane border color | set -g pane-border-style fg=color |
| Enable mouse | set -g mouse on |
| Change prefix key | set-option -g prefix C-[key] |
Remember to reload your configuration (tmux source ~/.tmux.conf) or restart tmux for changes to take effect.
Customizing tmux’s appearance can significantly enhance your workflow and make your terminal sessions more visually appealing and easier to navigate.
tmux Plugins
Plugins extend tmux’s functionality, adding new features and making it even more powerful. They can enhance your productivity, add visual improvements, or provide new capabilities.
Installing Tmux Plugin Manager (TPM)
Before you can easily use plugins, you should install the Tmux Plugin Manager (TPM):
-
Clone TPM repository:
git clone https://github.com/tmux-plugins/tpm ~/.tmux/plugins/tpm -
Add this to the bottom of your
~/.tmux.conf:# List of plugins set -g @plugin 'tmux-plugins/tpm' set -g @plugin 'tmux-plugins/tmux-sensible' # Initialize TMUX plugin manager (keep this line at the very bottom of tmux.conf) run '~/.tmux/plugins/tpm/tpm' -
Reload tmux configuration:
tmux source ~/.tmux.conf
Popular tmux Plugins
Here are some useful plugins to get you started:
-
tmux-resurrect: Saves and restores tmux sessions across system restarts.
set -g @plugin 'tmux-plugins/tmux-resurrect' -
tmux-continuum: Automatic saving and restoration of tmux sessions.
set -g @plugin 'tmux-plugins/tmux-continuum' -
tmux-yank: Enables copying to system clipboard.
set -g @plugin 'tmux-plugins/tmux-yank' -
tmux-battery: Displays battery percentage and status icon in tmux status-right.
set -g @plugin 'tmux-plugins/tmux-battery' -
tmux-cpu: Shows CPU usage in tmux status-right.
set -g @plugin 'tmux-plugins/tmux-cpu'
Installing and Using Plugins
-
Add the plugin to your
~/.tmux.confas shown above. -
Press
prefix+I(capital i) to fetch and install the plugin. -
The plugin should now be working. You might need to refresh your tmux environment with:
tmux source ~/.tmux.conf
Managing Plugins
- Install plugins:
prefix+I - Update plugins:
prefix+U - Remove/uninstall plugins not in the list:
prefix+alt+u
Table: Basic TPM Commands
| Action | Command |
|---|---|
| Install plugins | prefix + I |
| Update plugins | prefix + U |
| Remove unused plugins | prefix + alt + u |
Example Configuration with Plugins
Here’s an example of how your ~/.tmux.conf might look with some plugins:
# List of plugins
set -g @plugin 'tmux-plugins/tpm'
set -g @plugin 'tmux-plugins/tmux-sensible'
set -g @plugin 'tmux-plugins/tmux-resurrect'
set -g @plugin 'tmux-plugins/tmux-continuum'
set -g @plugin 'tmux-plugins/tmux-yank'

# Plugin configurations
set -g @continuum-restore 'on'

# Initialize TMUX plugin manager (keep this line at the very bottom of tmux.conf)
run '~/.tmux/plugins/tpm/tpm'
Plugins can significantly enhance your tmux experience, adding features that make your workflow more efficient and your tmux sessions more powerful. Experiment with different plugins to find the combination that works best for you.
Using tmux with SSH
Using tmux with SSH can make your remote work more efficient. When you SSH into a server, starting a tmux session helps you keep your work intact even if the connection drops. Here’s how to do it:
-
SSH into your server:
ssh your_username@server_address -
Start a new tmux session:
tmux new -s session_name -
Detach from the session: Press
Ctrl+b, thend. -
Reattach to an existing session:
tmux attach -t session_name
Common tmux Commands While SSH’d
-
List sessions:
tmux ls -
Kill a session:
tmux kill-session -t session_name -
Rename a session:
tmux rename-session -t old_name new_name
Advantages of Using tmux with SSH
- Persistence: Keep your work going even if the SSH connection drops.
- Multiplexing: Run multiple terminal sessions within a single SSH connection.
- Organization: Easily manage multiple tasks by naming and switching between sessions.
Example Workflow
-
SSH into your server.
-
Start a
tmuxsession named “dev”:tmux new -s dev -
Work on your tasks.
-
Detach from the session to take a break: Press
Ctrl+b, thend. -
Reattach to continue:
tmux attach -t dev
Using tmux with SSH can streamline your workflow and reduce headaches caused by lost connections. It’s a must-have tool for anyone working remotely on servers.
Troubleshooting Common Issues
Even with a smooth installation, you might encounter some hiccups using tmux on macOS. Here are common problems and how to fix them.
tmux Command Not Found
If you see a command not found: tmux error, it means tmux isn’t installed correctly or isn’t in your system’s PATH.
- Check Installation: Ensure tmux is installed by running
brew list | grep tmux. - Update PATH: Add tmux to your PATH by adding
export PATH="/usr/local/bin:$PATH"to your~/.bash_profileor~/.zshrc.
tmux Not Starting Properly
If tmux doesn’t start or crashes, it might be due to a configuration issue.
- Check Config File: Look for syntax errors in
~/.tmux.conf. You can test the file by runningtmux source-file ~/.tmux.conf. - Update tmux: Ensure you have the latest version by running
brew update && brew upgrade tmux.
Keybindings Not Working
Sometimes custom keybindings in your ~/.tmux.conf might not work.
- Syntax Check: Ensure your keybinding syntax is correct. Refer to tmux documentation for proper syntax.
- Reload Config: Apply changes by running
tmux source-file ~/.tmux.conf.
Display Issues
You might face issues with the terminal display or pane resizing.
- Terminal Compatibility: Make sure your terminal supports tmux. iTerm2 is a good option.
- Resize Panes: Use
Ctrl+bfollowed by:and typeresize-pane -Dorresize-pane -Uto adjust pane size.
Copy-Paste Problems
Copying and pasting text within tmux can be tricky.
- Enable Mouse Mode: Add
set -g mouse onto your~/.tmux.confto enable mouse support. - Use tmux Copy Mode: Enter copy mode with
Ctrl+b [and use arrow keys to navigate and select text.
tmux Sessions Freezing
If your tmux session freezes, it could be due to resource limitations or conflicts.
- Check System Resources: Ensure your system isn’t running out of memory or CPU.
- Kill Unresponsive Sessions: If needed, kill the tmux server with
tmux kill-serverand restart.
Lost tmux Sessions
If you lose a tmux session, you can usually recover it.
- List Sessions: Run
tmux lsto list active sessions. - Attach to Session: Reattach to a session with
tmux attach -t [session-name].
Permissions Issues
You might face permission errors when running tmux commands.
- Check Permissions: Ensure you have the correct permissions for the tmux binary and your configuration files.
- Run as Sudo: If necessary, run tmux commands with
sudo.
By addressing these common issues, you can ensure a smoother experience with tmux on macOS.
Conclusion
Installing tmux on macOS and learning the basic commands can significantly enhance your productivity. You now have the tools to manage multiple terminal sessions effortlessly. Practice these commands regularly to become proficient.
Feel free to explore more advanced features as you grow comfortable. tmux offers a world of possibilities for streamlining your workflow. Happy coding!

