Link GitHub with A SSH Key to MacOS or Linux
A tutorial that you can follow to create your first GitHub repo and link it via SSH to your laptop.

GitHub is a public repository where you can store your git projects. Most of the services offer integrations with GitHub and you can use it to store your projects or to store your static websites like Gatsy or Astro.
In this article, we will see how you can create a private repo on GitHub and connect it to your laptop with an SSH key.
Link GitHub with A SSH Key to MacOS or Linux
The first thing should be to have a GitHub account, to do that you just register to them. After we can go and proceed with the SSH key creation and add it to GitHub.
Generate an SSH Key on Mac or Linux
In this step we are going to generate the Key the below command should work on all systems:
ssh-keygen -t rsa -b 4096 -C "[email protected]"When you will get the prompts just hit enter to place the key into the default ~/.ssh directory. I will not set up a passphrase.
Get The Public Key and add it to GitHub
Now that the key is created we need to get the public key and add it to GitHub.
cat ~/.ssh/id_rsa.pubAdd the SSH Key to GitHub
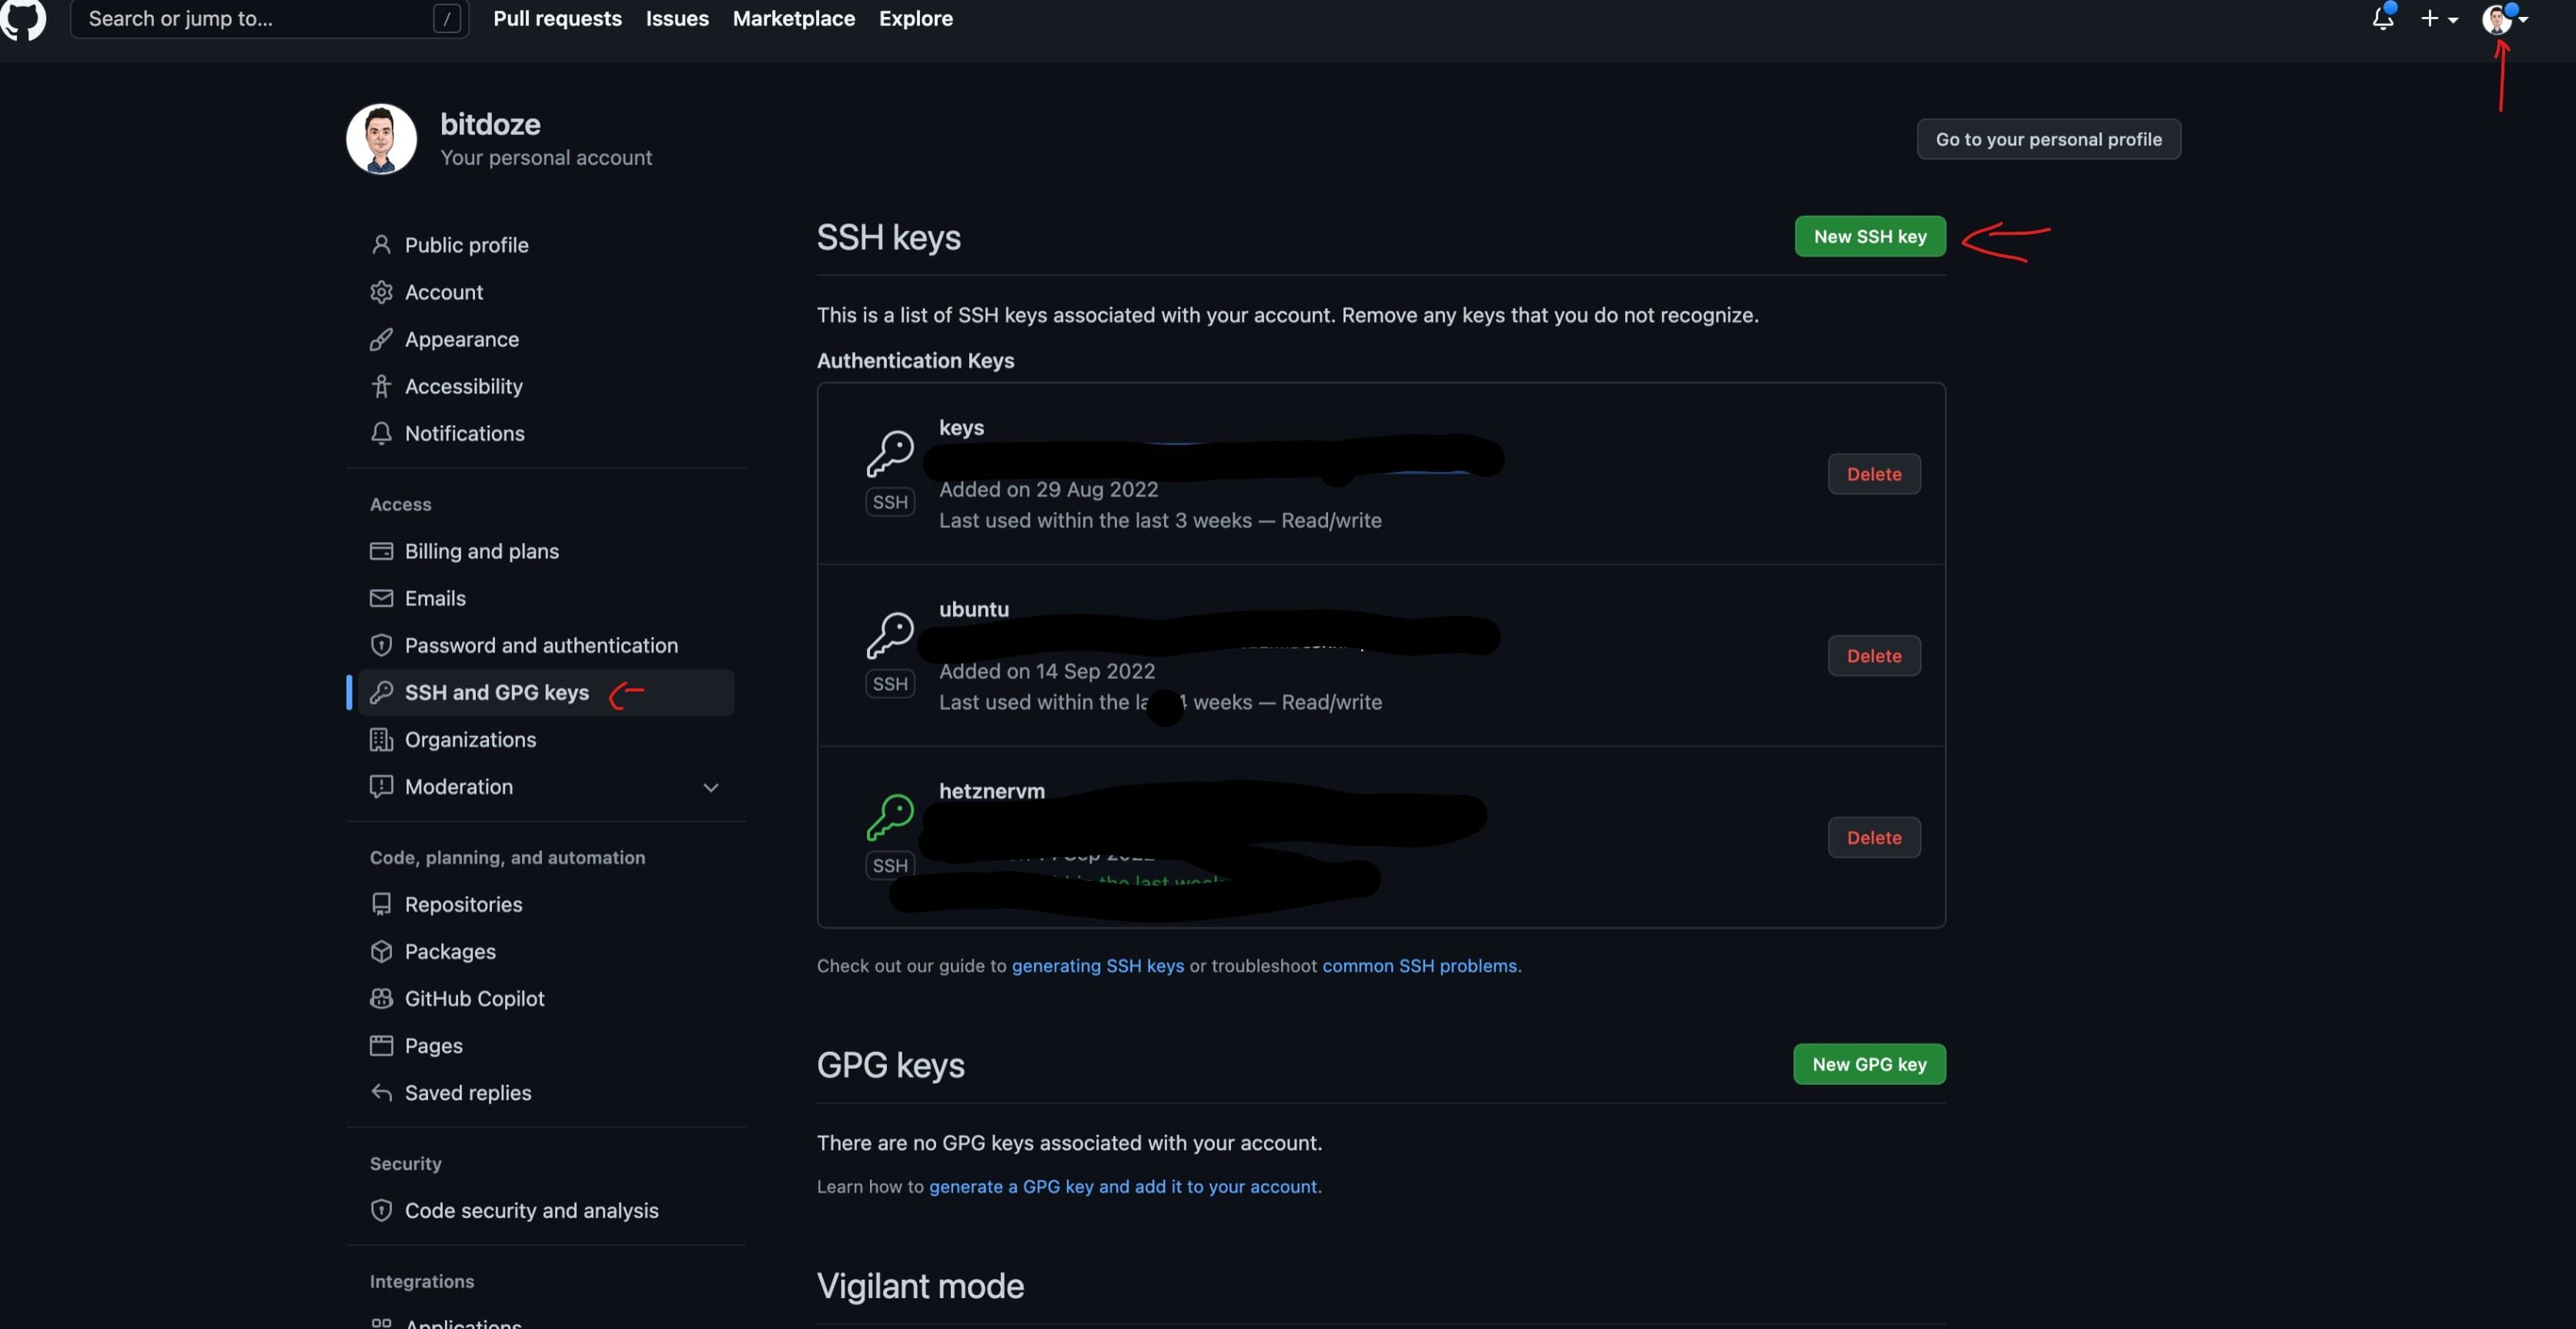
The output of the above command should be added to GitHub under Profile - Settings - SSH and GPG Keys - New SSH key

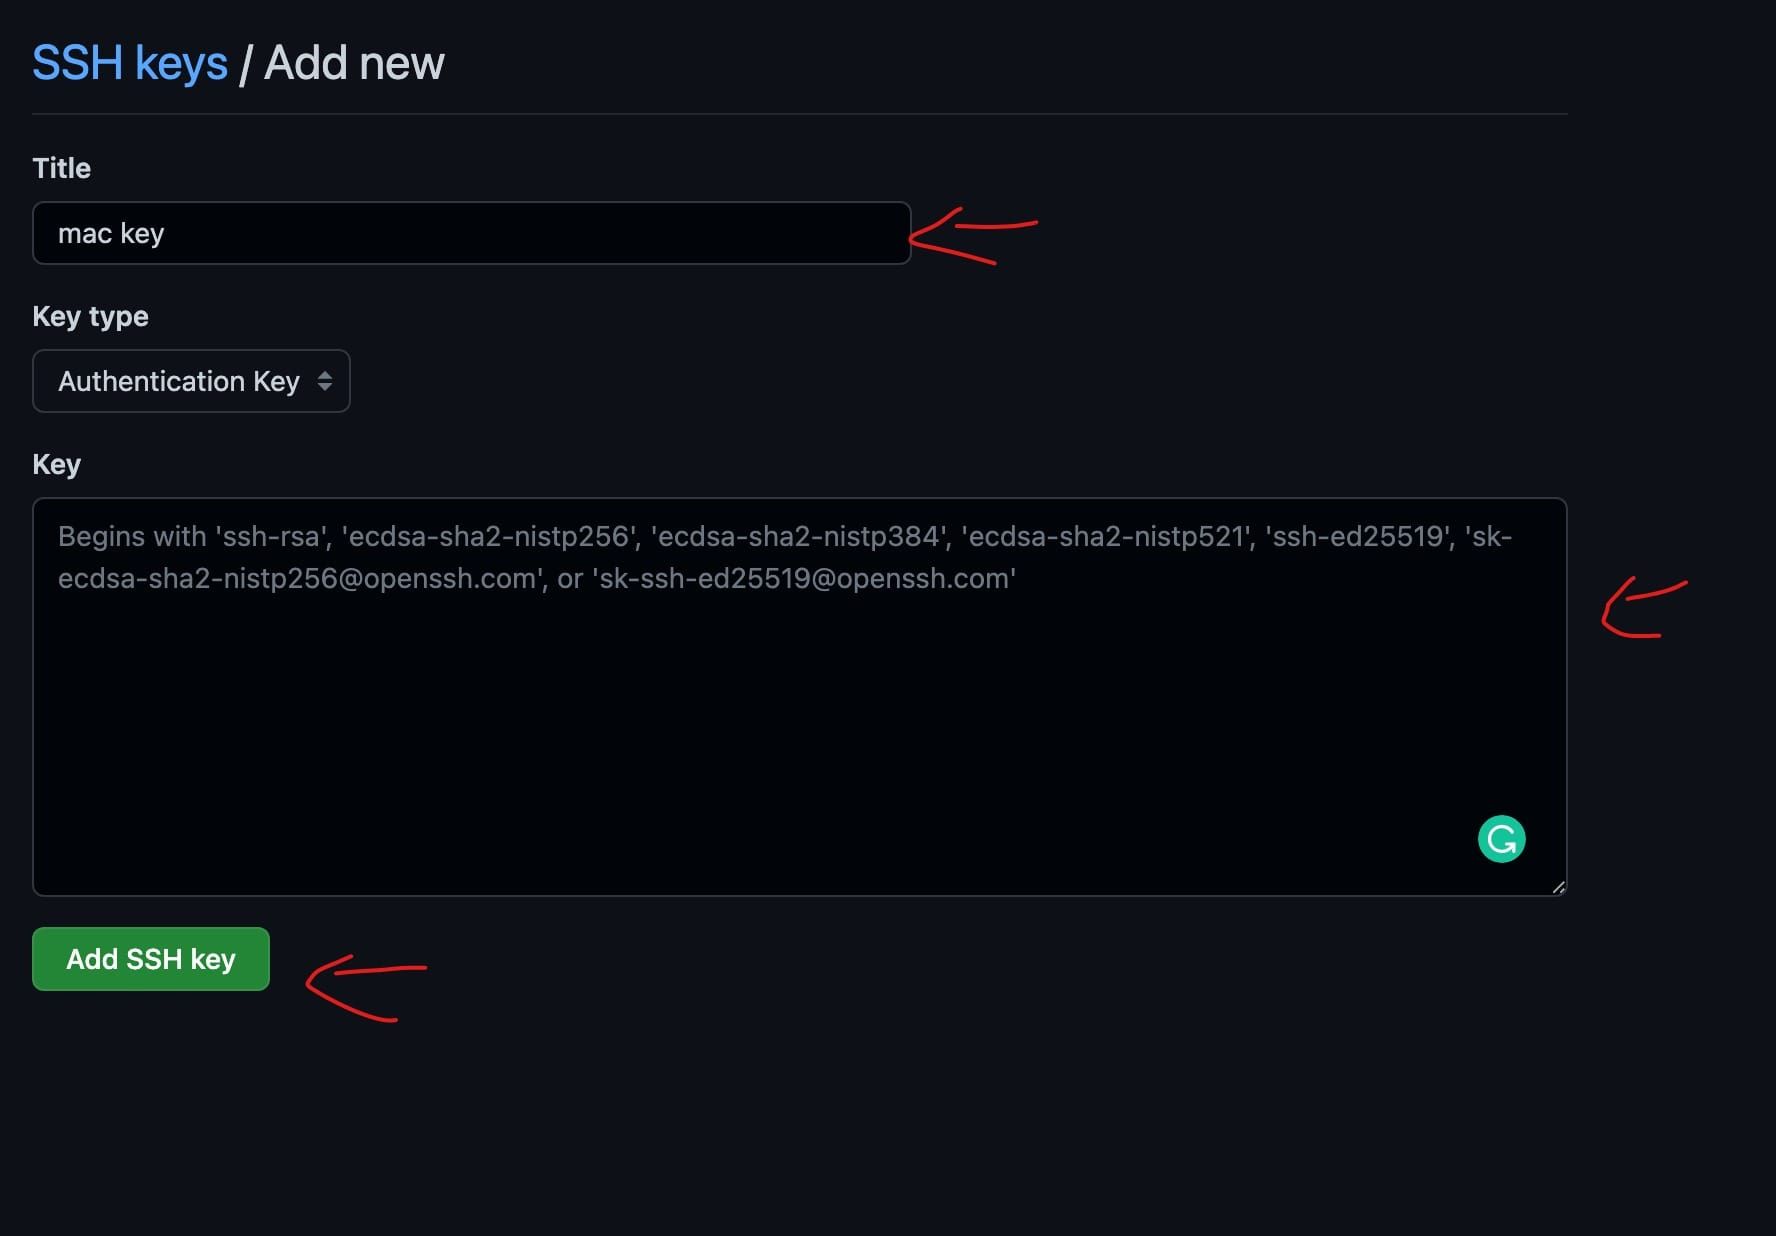
There you set a Title and under Key, you add the output from above.

Now your GitHub account should be linked to the laptop and you can
Youtube Video With Details
Create A GitHub Repo and Push From Your Laptop
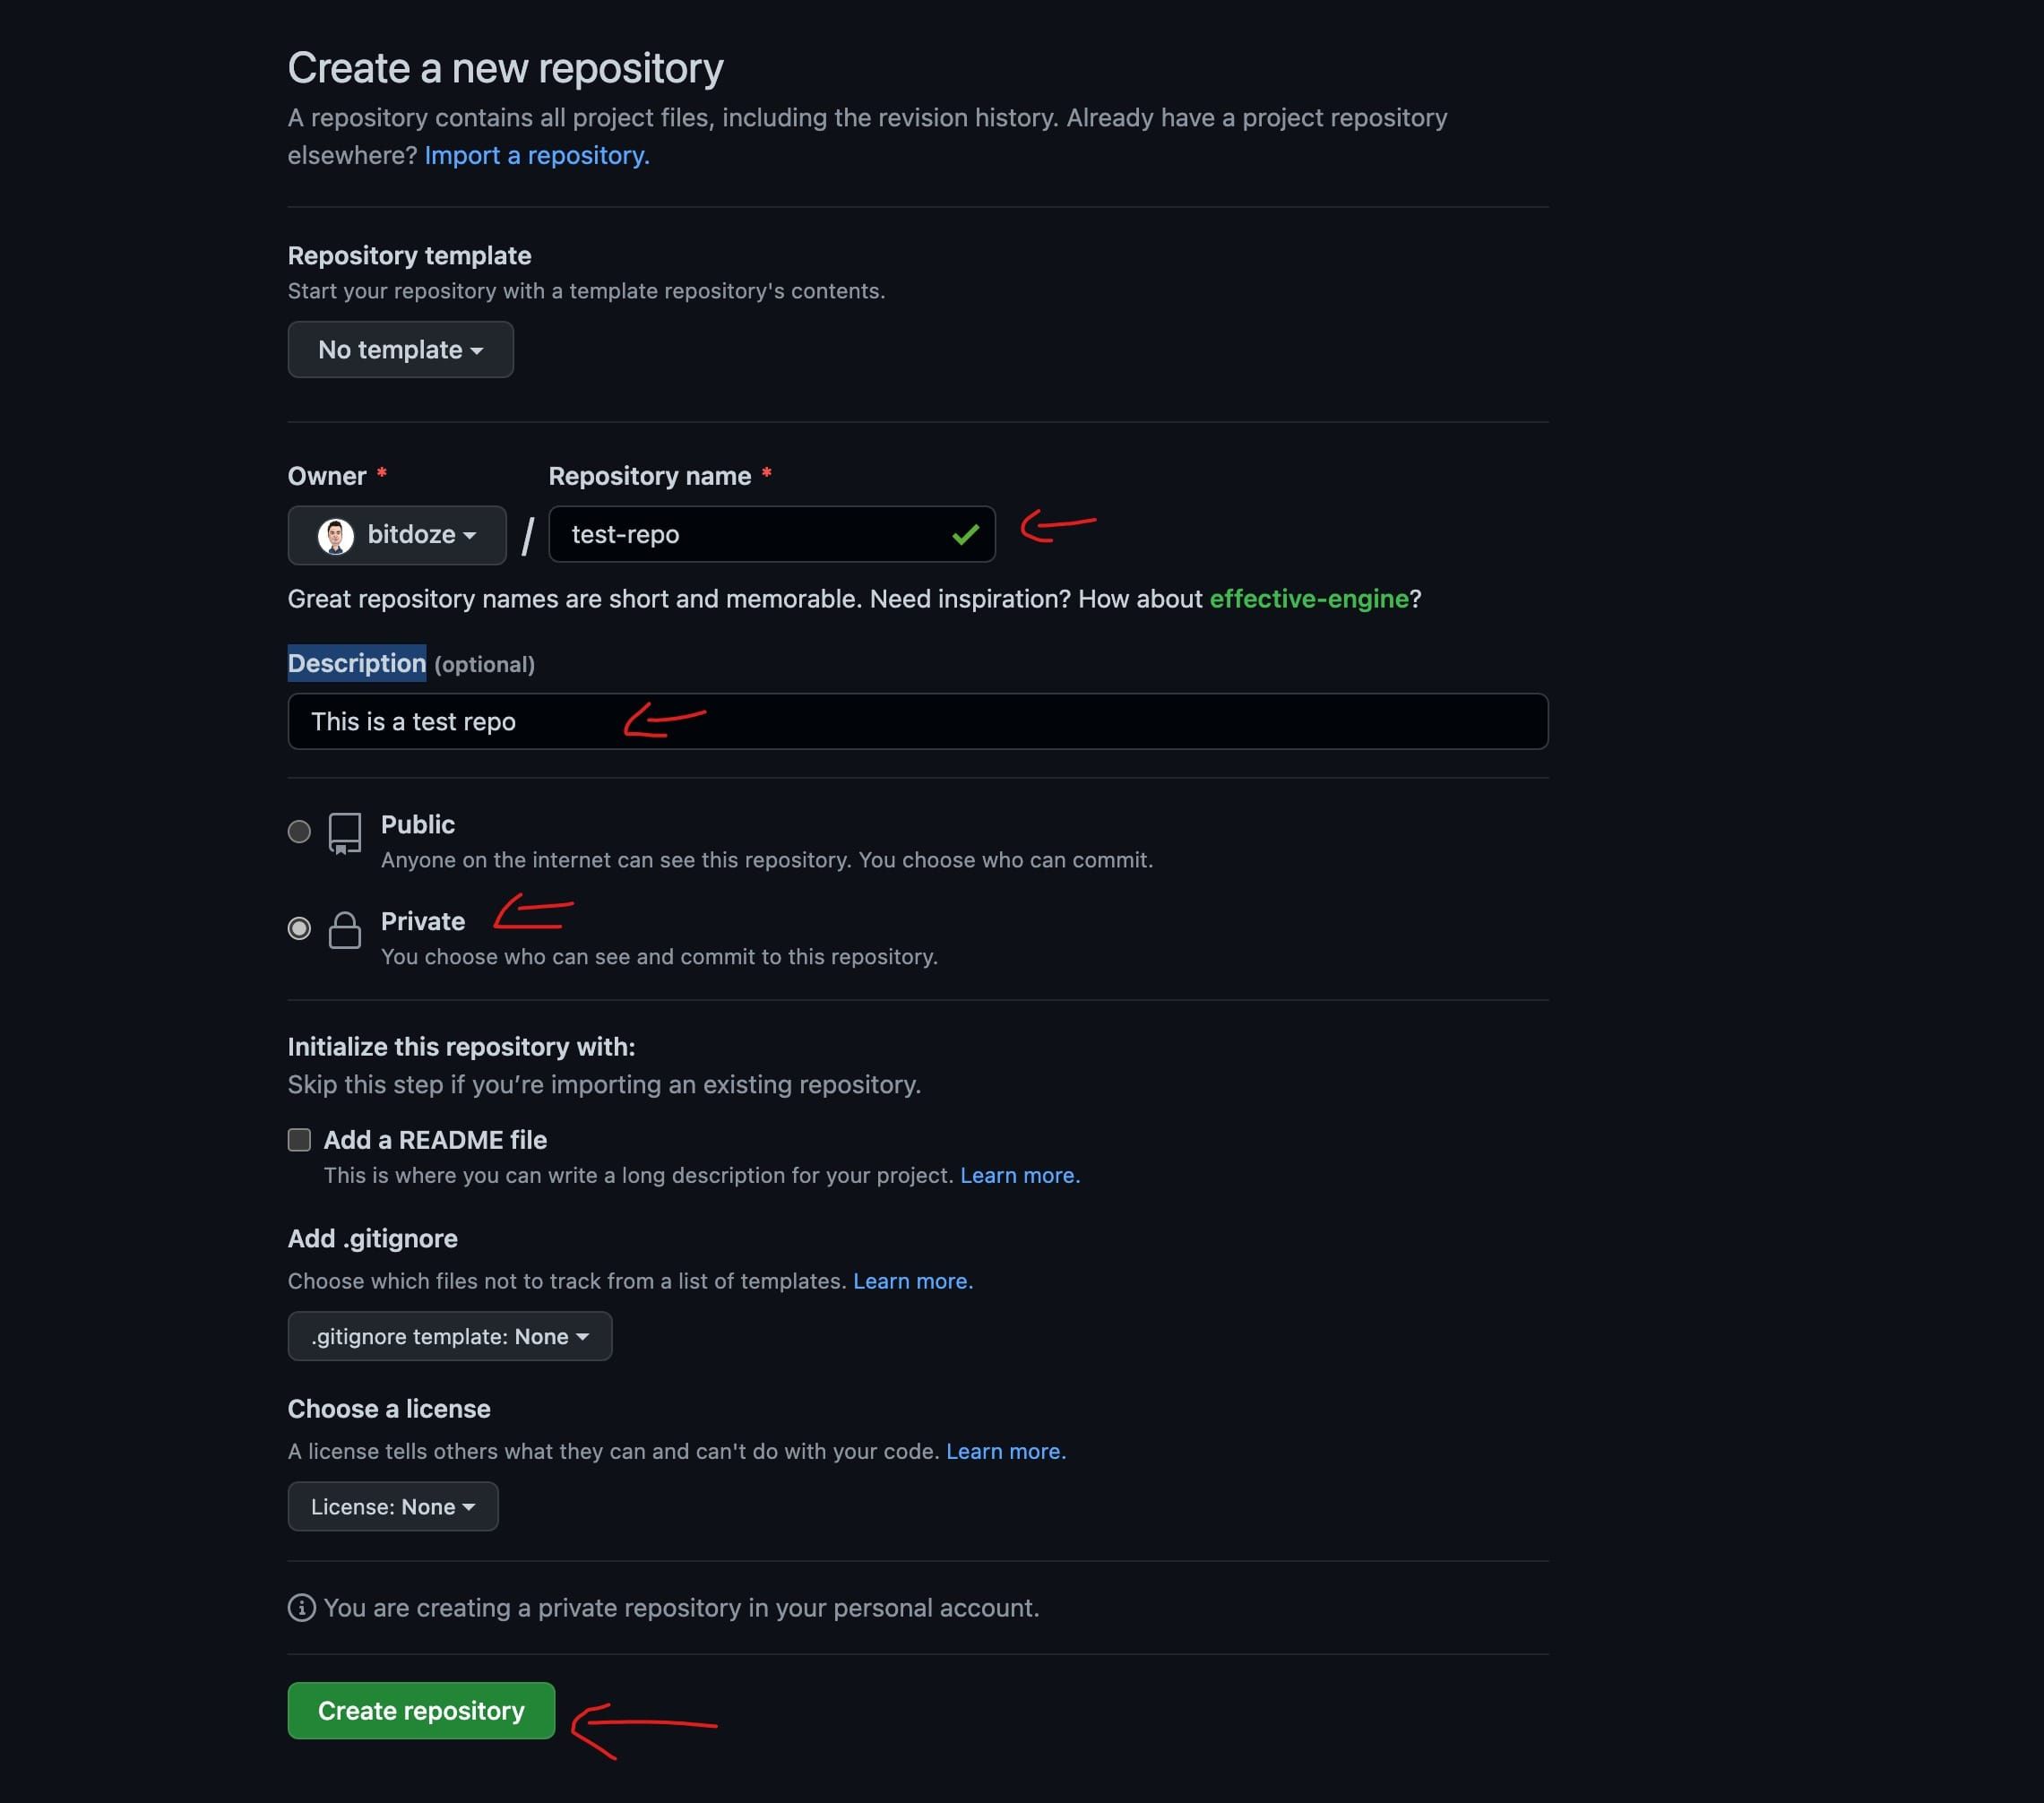
Now what remains to do is to create our GitHub repo and push it to GitHub. From your profile on the left side hit the New Repo and choose the below details:
- Repository name - add the name you like your repo to have, I have used test-repo
- Description - set a description for your repo, this is optional
- Private or Public - chose if the repo should be only for you.
And that’s about it after you just hit the Create repository

After we should go into our laptop and create a directory where the repo should be and initiate it.
Create the directory:
mkdir test-repoGo and initiate it, install git if you don,t have it:
#mac install
brew install git
#Ubuntu install
sudo apt install git
#go into the folder
cd test-repo
#initiate the repo
git init
Add a file to the repo”
echo "# test-repo for Bit Doze" >> README.mdAfter a file is added you need to add it to the repo with, the below command:
git add .Commit the change:
git commit -m "added read me file"Set the branch to main:
git branch -M mainLink the folder with the GitHub repo:
git remote add origin [email protected]:bitdoze/test-repo.gitPush the changes:
git push -u origin mainIn case you want to fetch an existing repo you can do it with:
git clone [email protected]:<repo>After you can do your modifications and push it back after.
Related Posts

Add Responsive YouTube Videos to Astro.JS MDX
Lets see how easy is to add a responsive YouTube video to Astro.js

Monitor CPU Usage and Send Email Alerts in Linux
Let's see how we can monitor CPU usage on a server and receive emails.

How To Install Plausible With One Click
Learn how to install Plausible Analytics with 1 click in docker via Coolify on your own server.