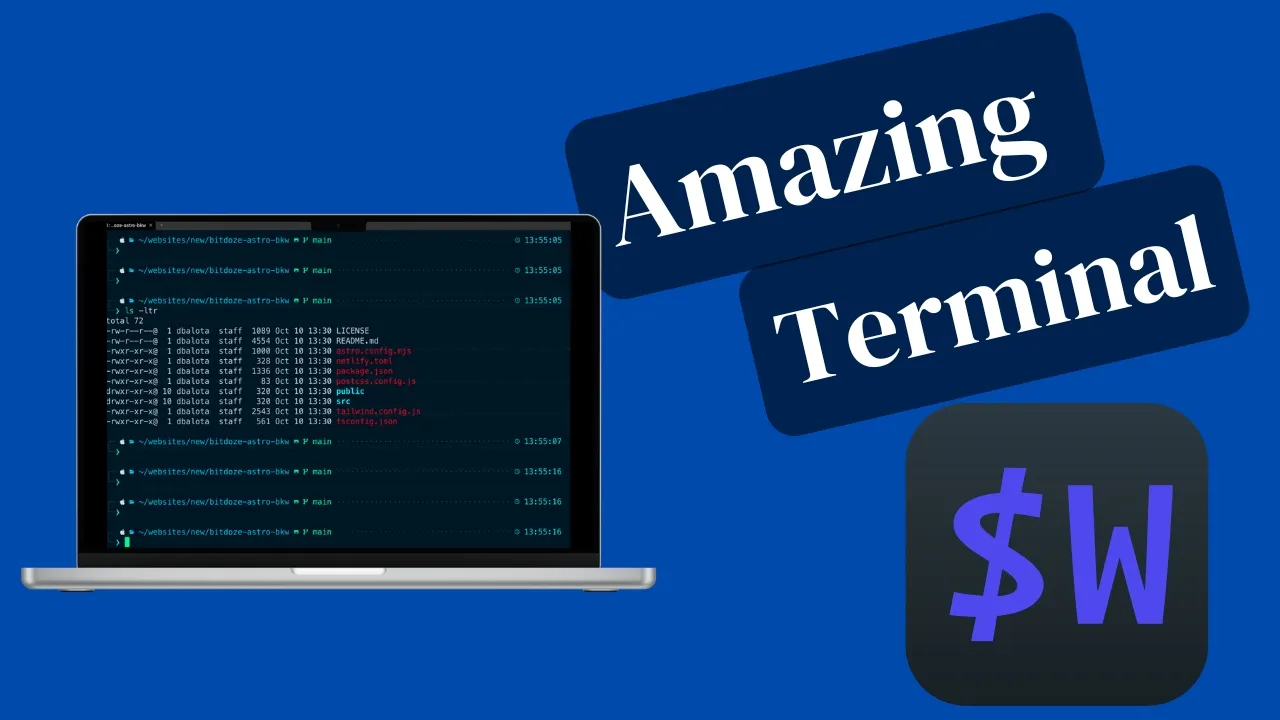
Maximize Efficiency: Integrating Wezterm, Zoxide, and Tmux for the Perfect Mac Terminal
Learn how to create a powerful and visually stunning terminal setup using Wezterm on Mac. This comprehensive guide covers installation, configuration, and integration with essential tools like Powerlevel10k, zsh plugins, and tmux for maximum productivity.

Wezterm is a modern, feature-rich terminal emulator that’s quickly gaining popularity among developers and power users. Developed by Wez Furlong and written in Rust, Wezterm offers a compelling blend of performance, customizability, and cross-platform compatibility.
Key features of Wezterm include:
-
GPU Acceleration: Wezterm leverages your computer’s GPU for rendering, resulting in smooth scrolling and excellent performance, even with complex terminal outputs.
-
Lua Configuration: Unlike many terminal emulators that use static config files, Wezterm allows you to configure it using Lua scripts, providing immense flexibility and programmability.
-
Built-in Multiplexer: Similar to tmux, Wezterm has built-in multiplexing capabilities, allowing you to manage multiple terminal sessions within a single window.
-
Ligature Support: For those using programming fonts with ligatures, Wezterm renders them beautifully, enhancing code readability.
-
Cross-Platform: Whether you’re on macOS, Windows, or Linux, Wezterm provides a consistent experience across all major operating systems.
-
Rich Color Support: Wezterm supports 24-bit true color and offers a wide range of color schemes out of the box.
-
Image Support: You can display images directly in the terminal, which can be particularly useful for certain workflows or just for customization.
By combining these features with its modern, sleek interface, Wezterm offers a powerful alternative to traditional terminal emulators, making it an excellent choice for users looking to enhance their command-line experience.
If you are interested to see some free cool Mac Apps you can check toolhunt.net mac apps section.
Install and configure Wezterm on Mac
In this section we are going to see all the things we need to do to have Wezterm configured on Mac with everything needed.
Install homebrew
Homebrew is a package manager for macOS that simplifies the installation of software on Apple’s operating system. It’s an essential tool for developers and power users, making it easy to install and manage various command-line tools and applications.
To install Homebrew, open your terminal and run the following command:
/bin/bash -c "$(curl -fsSL https://raw.githubusercontent.com/Homebrew/install/HEAD/install.sh)"This command does the following:
- It uses
curlto download the Homebrew installation script from GitHub. - The
-fsSLflags ensure a quiet, fail-fast download with automatic redirection. - The downloaded script is then piped directly to bash for execution.
After running this command, follow any on-screen prompts to complete the installation. You may need to enter your system password to grant the necessary permissions.
Once Homebrew is installed, you can verify the installation by running:
brew --versionThis should display the version of Homebrew installed on your system.
With Homebrew set up, you’re now ready to easily install Wezterm and other necessary components for your terminal setup.
Install Wezterm
Now that we have Homebrew installed, we can easily install Wezterm. Run the following command in your terminal:
brew install --cask weztermThis command uses Homebrew’s cask functionality, which is designed for installing macOS applications and large binaries. The --cask flag tells Homebrew to use the Cask version of the formula.
After the installation is complete, you can launch Wezterm from your Applications folder or by using Spotlight (Cmd + Space, then type “Wezterm”).
Install Git
Git is a distributed version control system that’s essential for many development workflows. While macOS comes with Git pre-installed, it’s often an older version. To ensure you have the latest version, let’s install Git using Homebrew:
brew install gitThis command will install the latest version of Git available through Homebrew.
After installation, you can verify the Git version by running:
git --versionThis should display the version of Git you just installed, which should be more recent than the one that came with your Mac.
Installing Git through Homebrew also makes it easier to keep it updated in the future. You can update all Homebrew packages, including Git, with the command:
brew upgradeWith Wezterm and Git installed, you’re now ready to move on to the next steps in customizing your terminal environment.
Install Meslo Nerd Font
Nerd Fonts are a collection of fonts that have been patched with a high number of glyphs (icons). They’re particularly useful for developers as they include many programming-related icons that can enhance your terminal and text editor experience.
To install the Meslo Nerd Font using Homebrew, run the following command:
brew install font-meslo-lg-nerd-fontThis command does the following:
- It uses Homebrew to install the Meslo LG Nerd Font.
- The font will be downloaded and installed in your system’s font directory.
After running this command, the font should be available for use in Wezterm and other applications on your Mac.
To verify that the font was installed correctly, you can check your Font Book application or use it in an application that allows font selection.
It’s worth noting that you may need to restart Wezterm or any other applications where you want to use this font after installation.
The Meslo Nerd Font is an excellent choice for terminal use as it’s clear, easily readable, and includes a wide range of glyphs that can be useful in command-line interfaces and programming environments.
In the next section, we’ll configure Wezterm to use this newly installed font.
Setup Wezterm Config File
Wezterm uses a Lua configuration file to customize its behavior and appearance. Let’s create and configure this file.
Create the Config File
First, we need to create the configuration file in the correct location. Run these commands in your terminal:
touch ~/.wezterm.lua
vim ~/.wezterm.lua
These commands do the following:
touchcreates an empty file named.wezterm.luain your home directory.vimopens this file in the Vim text editor. If you’re not comfortable with Vim, you can use any text editor you prefer.
Configure Wezterm
Now that we’ve created the file, let’s add some configuration. Copy and paste the following Lua code into your .wezterm.lua file:
-- Pull in the wezterm API
local wezterm = require("wezterm")

-- This will hold the configuration.
local config = wezterm.config_builder()

-- This is where you actually apply your config choices

config.font = wezterm.font("MesloLGS Nerd Font Mono")
config.font_size = 19

config.window_decorations = "RESIZE"
config.window_background_opacity = 0.8
config.macos_window_background_blur = 10

-- my coolnight colorscheme:
config.colors = {
    foreground = "#CBE0F0",
    background = "#011423",
    cursor_bg = "#47FF9C",
    cursor_border = "#47FF9C",
    cursor_fg = "#011423",
    selection_bg = "#033259",
    selection_fg = "#CBE0F0",
    ansi = { "#214969", "#E52E2E", "#44FFB1", "#FFE073", "#0FC5ED", "#a277ff", "#24EAF7", "#24EAF7" },
    brights = { "#214969", "#E52E2E", "#44FFB1", "#FFE073", "#A277FF", "#a277ff", "#24EAF7", "#24EAF7" },
}

-- and finally, return the configuration to wezterm
return config
Let’s break down what this configuration does:
- It sets the font to the Meslo Nerd Font we just installed.
- Sets the font size to 19.
- Configures the window to be resizable.
- Sets the background opacity to 80% and adds a blur effect (MacOS only).
- Defines a custom color scheme called “coolnight”.
config.colors description:
-
foreground = "#CBE0F0": This sets the default text color to a light blue-gray. -
background = "#011423": This sets the background color to a very dark blue, almost black. -
cursor_bg = "#47FF9C": This sets the background color of the cursor to a bright green. -
cursor_border = "#47FF9C": This sets the border color of the cursor to the same bright green. -
cursor_fg = "#011423": This sets the foreground color of the cursor (for block cursors) to the same dark blue as the background. -
selection_bg = "#033259": This sets the background color for selected text to a dark blue. -
selection_fg = "#CBE0F0": This sets the foreground color for selected text to the same light blue-gray as the default text. -
ansi = {...}: This array defines the colors for the first 8 ANSI color codes (0-7). These are used for basic color formatting in the terminal. -
brights = {...}: This array defines the colors for the bright versions of the ANSI color codes (8-15). These are often used for bold or highlighted text.
In both ansi and brights arrays, the colors represent:
- Black
- Red
- Green
- Yellow
- Blue
- Magenta
- Cyan
- White
This color scheme appears to be a custom “coolnight” theme, with a dark blue background and various bright, contrasting colors for text and highlights. It’s designed to be easy on the eyes while providing good contrast for readability.
After saving this file and restarting Wezterm, you should see the changes take effect. You can further customize this configuration to your liking by adjusting colors, key bindings, and other settings as needed.
Remember, Wezterm’s configuration is dynamic and in Lua, so you can add conditional logic, functions, and even pull in external data if you want to create a more complex setup.
Install powerlevel10k theme
Powerlevel10k is a highly customizable theme for Zsh that emphasizes speed, flexibility, and out-of-the-box experience. It’s designed to make your command line informative and visually appealing without sacrificing performance.
To install Powerlevel10k using Homebrew, run the following commands:
brew install powerlevel10k
echo "source $(brew --prefix)/share/powerlevel10k/powerlevel10k.zsh-theme" >> ~/.zshrc
Let’s break down what these commands do:
- The first command installs Powerlevel10k using Homebrew.
- The second command adds a line to your
.zshrcfile that sources the Powerlevel10k theme. This ensures that the theme is loaded every time you start a new Zsh session.
After running these commands, you need to apply the changes to your current session:
source ~/.zshrcThis command reloads your Zsh configuration, applying the Powerlevel10k theme.
When you first run this, you’ll likely be greeted with the Powerlevel10k configuration wizard. This interactive process allows you to customize various aspects of your prompt, including:
- The style of the prompt
- Which segments to display (git status, time, etc.)
- Color scheme
- Icons and glyphs
Follow the on-screen instructions to set up Powerlevel10k according to your preferences. Don’t worry if you’re not sure about some options – you can always reconfigure later by running p10k configure.
Once configured, you’ll have a highly informative and visually appealing prompt that can show git status, execution time of commands, and much more, all while maintaining excellent performance.
Remember, you can always fine-tune your Powerlevel10k configuration by editing the ~/.p10k.zsh file that was created during the configuration process.
Setup zsh-autosuggestions plugin
Zsh-autosuggestions is a powerful plugin that suggests commands as you type based on your command history and completions. It can significantly speed up your command-line workflow by reducing the amount of typing needed for frequently used commands.
For a more detailed guide on enabling command autocomplete in Zsh, check out this article: Enable Command Autocomplete in Zsh
To install zsh-autosuggestions using Homebrew, run the following commands:
brew install zsh-autosuggestions
echo "source $(brew --prefix)/share/zsh-autosuggestions/zsh-autosuggestions.zsh" >> ~/.zshrc
source ~/.zshrc
Let’s break down these commands:
- The first command installs the zsh-autosuggestions plugin using Homebrew.
- The second command adds a line to your
.zshrcfile that sources the zsh-autosuggestions plugin. This ensures that the plugin is loaded every time you start a new Zsh session. - The third command reloads your Zsh configuration, applying the changes immediately.
After running these commands, you should see autosuggestions appear as you type in your terminal. The suggestions will be shown in a faded gray color. To accept a suggestion, you can typically press the right arrow key or End key.
You can customize the behavior of zsh-autosuggestions by adding configuration options to your .zshrc file. For example, you can change the color of the suggestions or modify the key bindings used to accept suggestions.
With zsh-autosuggestions set up, you’ll find that entering commands becomes faster and more efficient, especially for long or complex commands that you use frequently.
Setup zsh-syntax-highlighting
Zsh-syntax-highlighting is a plugin that provides syntax highlighting for the shell zsh. It enables highlighting of commands while they are typed at a zsh prompt into an interactive terminal. This helps in catching syntax errors, missing quotes, and other common mistakes before executing a command.
For a more comprehensive guide on enabling syntax highlighting in Zsh, check out this article: Enable Syntax Highlighting in Zsh
To install zsh-syntax-highlighting using Homebrew, run the following commands:
brew install zsh-syntax-highlighting
echo "source $(brew --prefix)/share/zsh-syntax-highlighting/zsh-syntax-highlighting.zsh" >> ~/.zshrc
source ~/.zshrc
Let’s break down these commands:
- The first command installs the zsh-syntax-highlighting plugin using Homebrew.
- The second command adds a line to your
.zshrcfile that sources the zsh-syntax-highlighting plugin. This ensures that the plugin is loaded every time you start a new Zsh session. - The third command reloads your Zsh configuration, applying the changes immediately.
After running these commands, you should see syntax highlighting in your terminal as you type commands. Typically, correctly typed commands will appear in green, while errors or unknown commands will appear in red.
Some key features of zsh-syntax-highlighting include:
- Command highlighting: Valid commands are highlighted differently from invalid ones.
- Option highlighting: Valid options for commands are highlighted.
- Path highlighting: Existing file paths are underlined.
- Bracket matching: Brackets are highlighted in pairs.
You can customize the colors and styles used by zsh-syntax-highlighting by adding configuration options to your .zshrc file. This allows you to tailor the appearance to your preferences or to match your terminal’s color scheme.
With zsh-syntax-highlighting set up, you’ll find it easier to spot and correct mistakes in your commands before executing them, leading to a more efficient and error-free command-line experience.
Enhance Wezterm with tmux and zoxide
While Wezterm is already a powerful terminal emulator, we can further enhance its capabilities by integrating it with tmux for advanced session management and zoxide for smarter directory navigation.
What is tmux and how can it help
Tmux (Terminal Multiplexer) is a powerful tool that allows you to create multiple terminal sessions within a single window. It’s particularly useful for:
- Managing multiple terminal sessions
- Running long processes in the background
- Sharing terminal sessions with other users
- Preserving your terminal setup across system reboots
To learn more about tmux and its basic usage, check out this guide: Tmux Basics
To install tmux using Homebrew, run:
brew install tmuxAfter installation, you can start a new tmux session by simply typing tmux in your terminal.
What is zoxide and how can it help
Zoxide is a smarter cd command that helps you navigate your filesystem more efficiently. It remembers which directories you use most frequently, so you can “jump” to them in just a few keystrokes.
Key features of zoxide include:
- Faster navigation to frequently-used directories
- Fuzzy matching for directory names
- Integration with common shells and file managers
For a detailed guide on using zoxide, refer to this article: Zoxide Guide
To install zoxide using Homebrew, run:
brew install zoxideThen, add the following line to your ~/.zshrc file to initialize zoxide:
eval "$(zoxide init zsh)"After restarting your shell or running source ~/.zshrc, you can start using zoxide. For example, use z instead of cd to navigate to directories.
By integrating tmux and zoxide with Wezterm, you’re creating a powerful, efficient terminal environment. Tmux allows you to manage complex workflows with multiple panes and windows, while zoxide speeds up your navigation between projects and directories. Together with Wezterm’s GPU acceleration and customizability, you’ll have a terminal setup that significantly boosts your productivity.
Conclusions
By following this guide, you’ve not only set up a visually appealing terminal but also created a powerful development environment that can significantly improve your workflow efficiency.
Remember, the beauty of this setup lies in its flexibility. Feel free to further customize your Wezterm configuration, explore additional zsh plugins, or tweak your Powerlevel10k settings to perfectly match your working style.
As you become more comfortable with your new setup, you may find yourself discovering new ways to optimize your command-line experience. Embrace this process of continuous improvement – after all, one of the joys of being a developer is constantly refining our tools and workflows.
With your new Wezterm setup, you’re well-equipped to tackle your development tasks with increased speed, clarity, and enjoyment. Happy coding!


