How to Install FlowiseAI with Docker Compose
Learn how you can FlowiseAI with docker compose and Postgres DB and take advantage of no-code AI flows.

FlowiseAI is an open-source platform that allows you to build and deploy custom AI workflows using a drag-and-drop interface. It provides a user-friendly way to integrate various AI models, APIs, and data sources into your applications without writing complex code. FlowiseAI is built on top of Node.js and React, making it easy to extend and customize.
In this tutorial, we are going to see how easy is to host FlowiseAI on your VPS server with docker-compose and have an SSL certificate. I will include also an option to backup the database with Docker DB Backup to have the SQL dumps in case something goes wrong and you can’t use the volumes.
We are going to use Dockge to administrate the docker-compose file and as reverse proxy CloudFlare Tunnels. You can also use docker-compose to deploy as it will work the same on whatever reverse proxy you prefer.
If you are interested to see some free cool open source self hosted apps you can check toolhunt.net self hosted section.
How to Install FlowiseAI with Docker and Docker Compose
In case you are interested to monitor server resources like CPU, memory, disk space you can check: How To Monitor Server and Docker Resources
1. Prerequisites
Before you begin, make sure you have the following prerequisites in place:
- VPS where you can host FlowiseAI, you can use one from Hetzner or use a Mini PC as Home Server
- Docker and Dockge installed on your server, you can check the Dockge - Portainer Alternative for Docker Management for the full tutorial.
- CloudFlare Tunnels are configured for your VPS server, the details are in the article here I deployed Dockge
- OR reverse proxy with CloudPanel you can check: Setup CloudPanel As Reverse Proxy with Docker and Dockge
You can use also Traefik as a reverse proxy for your apps. I have created a full tutorial with Dockge install also to manage your containers on: How to Use Traefik as A Reverse Proxy in Docker
Having all of this you will be ready to move to next step and add the containers in Dockge.
2. Create Docker Compose File
The first step is to create a Docker Compose file that defines the services required to run FlowiseAI. Here’s an example docker-compose.yml file:
version: "3.9"
services:
  flowise-db:
    image: postgres:16-alpine
    hostname: flowise-db
    environment:
      POSTGRES_DB: ${POSTGRES_DB}
      POSTGRES_USER: ${POSTGRES_USER}
      POSTGRES_PASSWORD: ${POSTGRES_PASSWORD}
    volumes:
      - ./flowise-db-data:/var/lib/postgresql/data
    restart: unless-stopped
    healthcheck:
      test: ["CMD-SHELL", "pg_isready -U ${POSTGRES_USER} -d ${POSTGRES_DB}"]
      interval: 5s
      timeout: 5s
      retries: 5

  flowise:
    image: flowiseai/flowise:latest
    container_name: flowiseai
    hostname: flowise
    healthcheck:
      test: wget --no-verbose --tries=1 --spider http://localhost:${PORT}
    ports:
      - 5023:${PORT}
    volumes:
      - ./flowiseai:/root/.flowise
    environment:
      DEBUG: false
      PORT: ${PORT}
      FLOWISE_USERNAME: ${FLOWISE_USERNAME}
      FLOWISE_PASSWORD: ${FLOWISE_PASSWORD}
      APIKEY_PATH: /root/.flowise
      SECRETKEY_PATH: /root/.flowise
      LOG_LEVEL: info
      LOG_PATH: /root/.flowise/logs
      DATABASE_TYPE: postgres
      DATABASE_PORT: 5432
      DATABASE_HOST: flowise-db
      DATABASE_NAME: ${POSTGRES_DB}
      DATABASE_USER: ${POSTGRES_USER}
      DATABASE_PASSWORD: ${POSTGRES_PASSWORD}
    restart: on-failure:5
    depends_on:
      flowise-db:
        condition: service_healthy
    entrypoint: /bin/sh -c "sleep 3; flowise start"
This Compose file defines two services:
flowise-db: A PostgreSQL database service used by FlowiseAI to store data.flowise: The FlowiseAI service itself, which depends on theflowise-dbservice.
The flowise service uses the official flowiseai/flowise:latest Docker image and exposes port 3000 (configurable via the PORT environment variable). It also mounts a volume at /root/.flowise to persist data across container restarts.
The Compose file also includes a healthcheck for the flowise service, which checks if the FlowiseAI application is running and accessible on http://localhost:3000.
If you want to include a backup solution for the PostgreSQL database, you can add a third service to the Compose file:
flowise-db-backup:
  container_name: flowise-db-backup
  image: tiredofit/db-backup
  volumes:
    - ./backups:/backup
  environment:
    DB_TYPE: postgres
    DB_HOST: flowise-db
    DB_NAME: ${POSTGRES_DB}
    DB_USER: ${POSTGRES_USER}
    DB_PASS: ${POSTGRES_PASSWORD}
    DB_BACKUP_INTERVAL: 720
    DB_CLEANUP_TIME: 72000
    CHECKSUM: SHA1
    COMPRESSION: GZ
    CONTAINER_ENABLE_MONITORING: false
  depends_on:
    flowise-db:
      condition: service_healthy
  restart: unless-stopped
This service uses the tiredofit/db-backup image to create regular backups of the PostgreSQL database. The backups are stored in the ./backups directory on the host machine.
3. Create .env file with credentials
Next, create a .env file in the same directory as your docker-compose.yml file and add the required environment variables:
PORT=3000
POSTGRES_USER='user'
POSTGRES_PASSWORD='pass'
POSTGRES_DB='flowise'
FLOWISE_USERNAME=bitdoze
FLOWISE_PASSWORD=bitdoze
Replace the values with your desired credentials and database name.
4. Deploy FlowiseAI
With the Docker Compose file and the .env file in place, you can now deploy FlowiseAI using Docker Compose:
docker-compose up -dThis command will start the services defined in the Compose file in detached mode (running in the background).
To check if the containers are running, use the following command:
docker psYou should see the flowise and flowise-db containers listed as running.
5. Configure the CloudFlare Tunnels for SSL and Domain access
To access FlowiseAI securely over the internet, you can set up CloudFlare Tunnels. CloudFlare Tunnels provide a secure way to expose your FlowiseAI instance to the internet without exposing your server’s IP address.
Go in Access - Tunnels and choose the tunnel you created and add a hostname that will link a domain or subdomain and the service and port.

You can also check Setup CloudPanel as Reverse Proxy with Docker and Dokge to use CloudPanel as a reverse proxy to your Docker containers or How to Use Traefik as A Reverse Proxy in Docker.
6. Create your first FlowiseAI flow
Once your FlowiseAI instance is up and running, you can access the web interface by navigating to http://localhost:3000 (or the domain you configured with CloudFlare Tunnels).
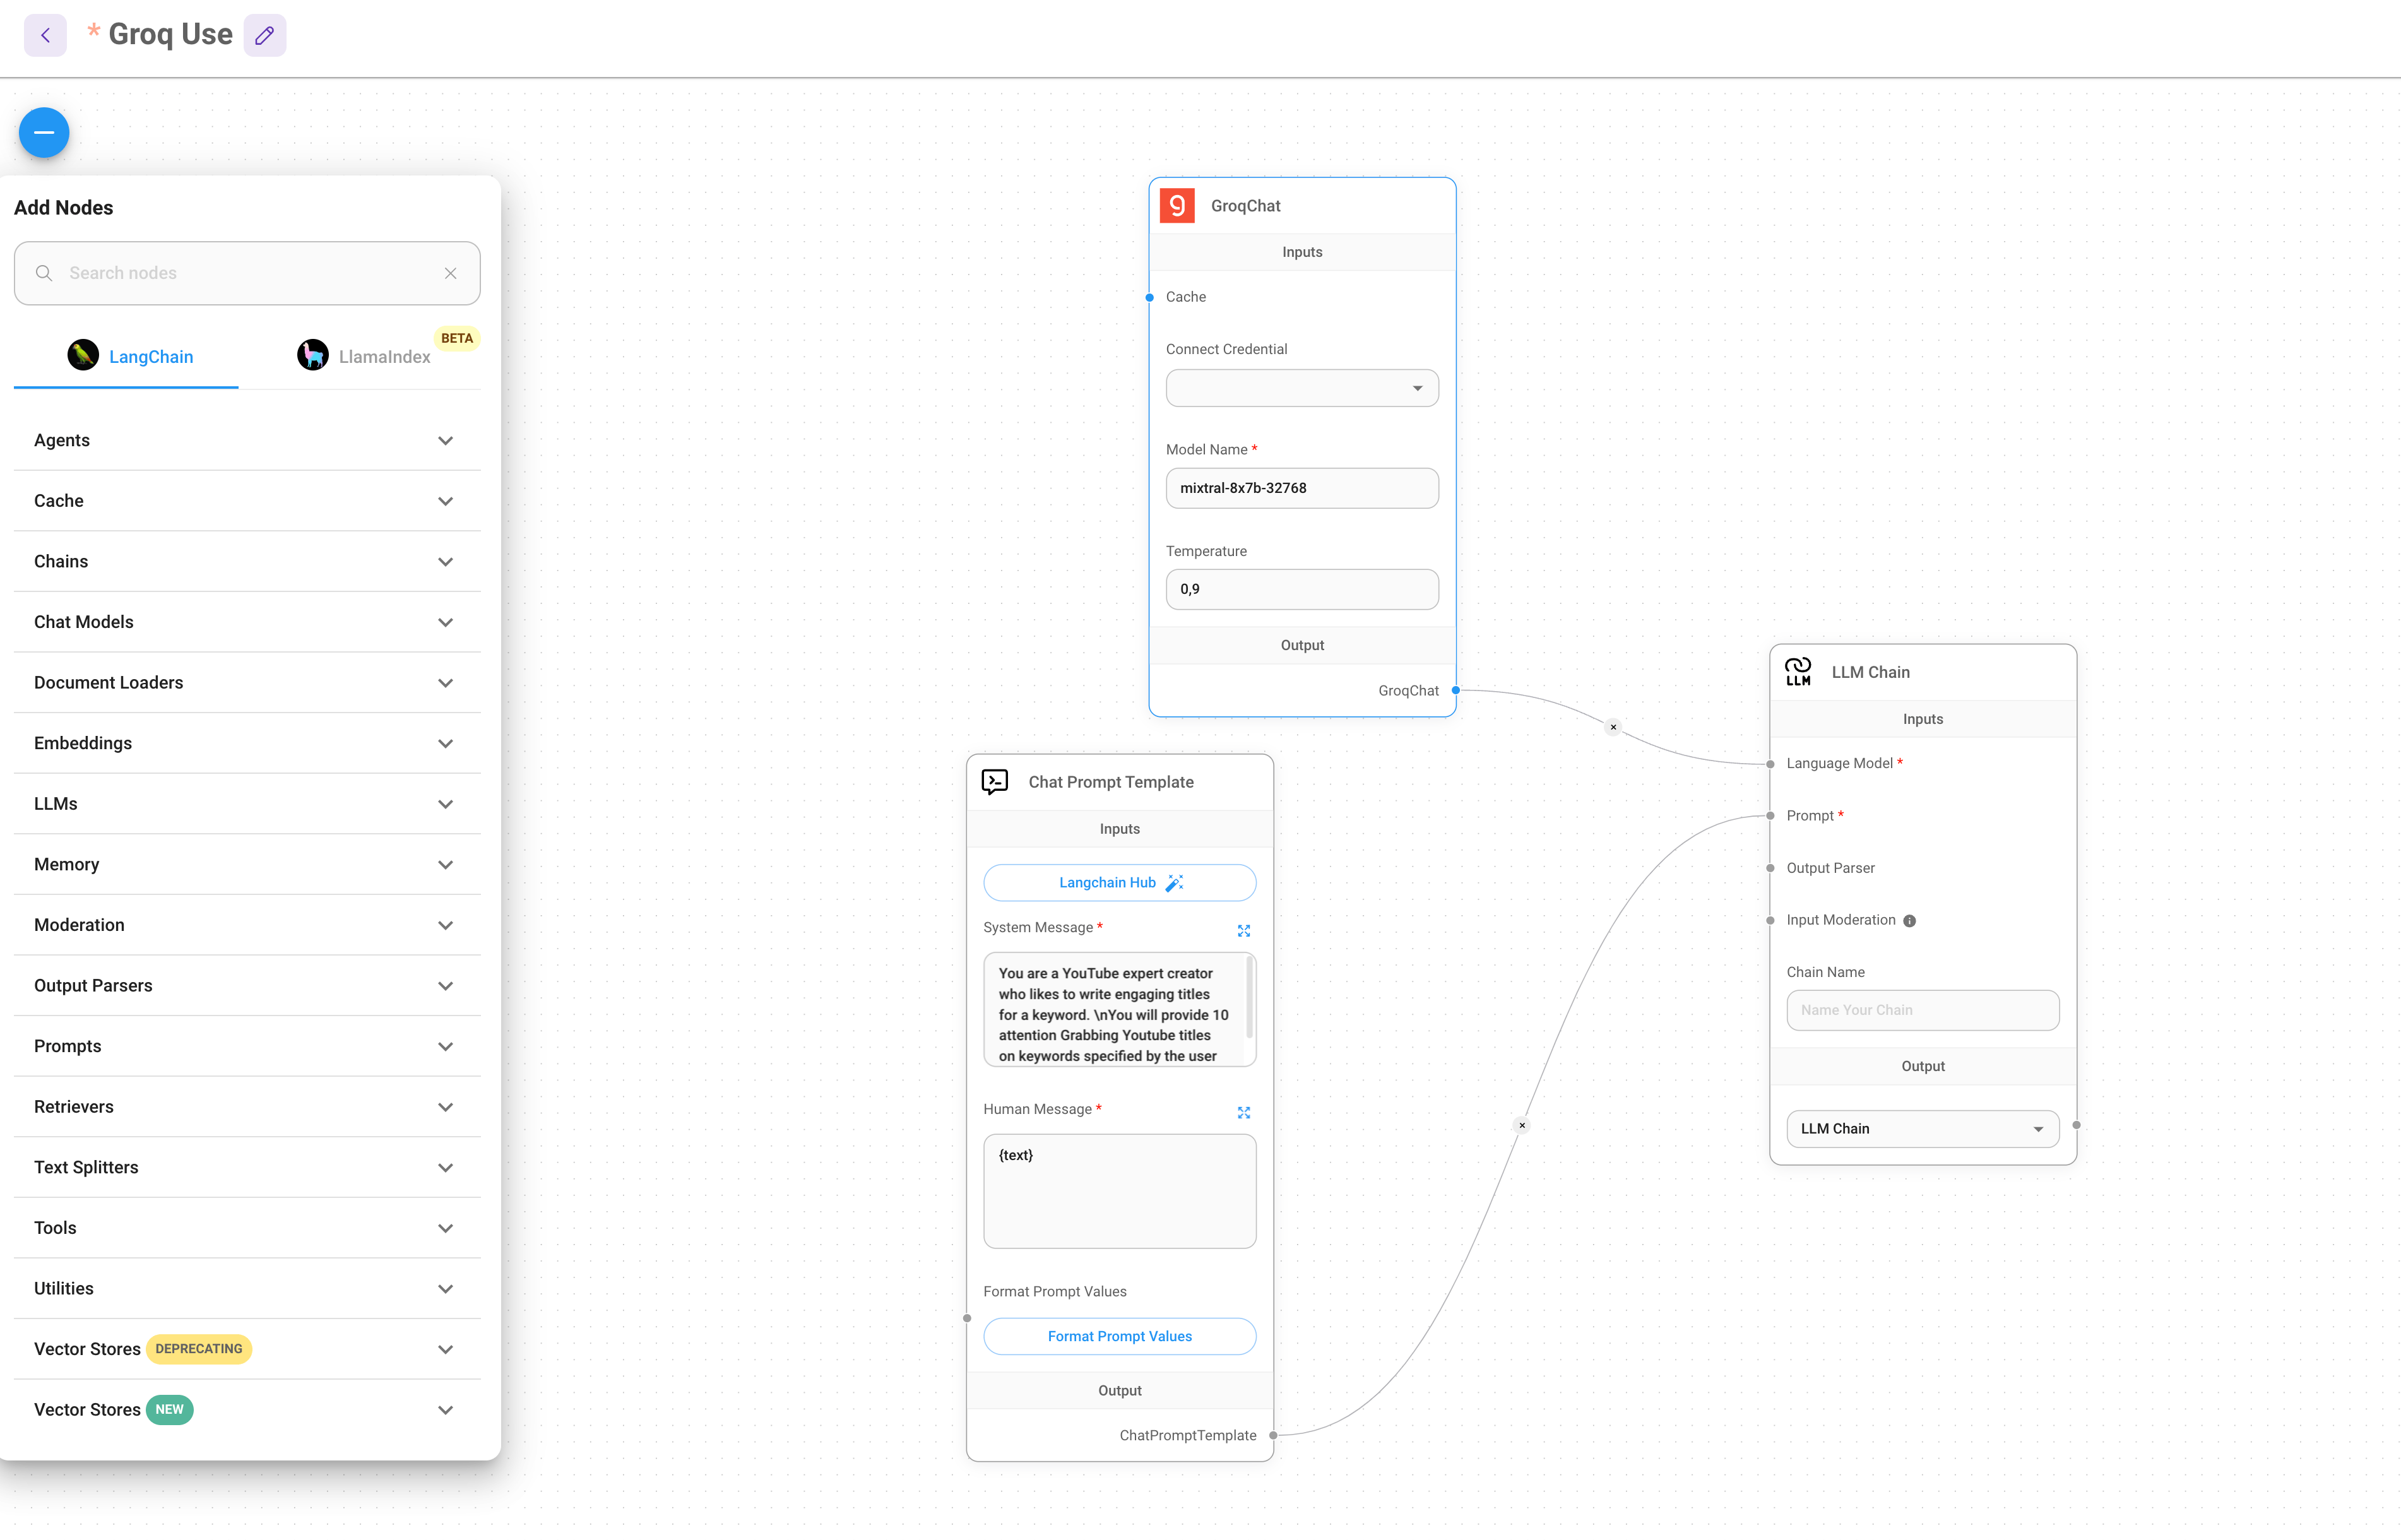
From the FlowiseAI interface, you can start creating your first AI workflow by dragging and dropping nodes, connecting them, and configuring their settings.

You have also a marketplace with flows that can be used.
7. Use the FlowiseAI Chatflow Externally
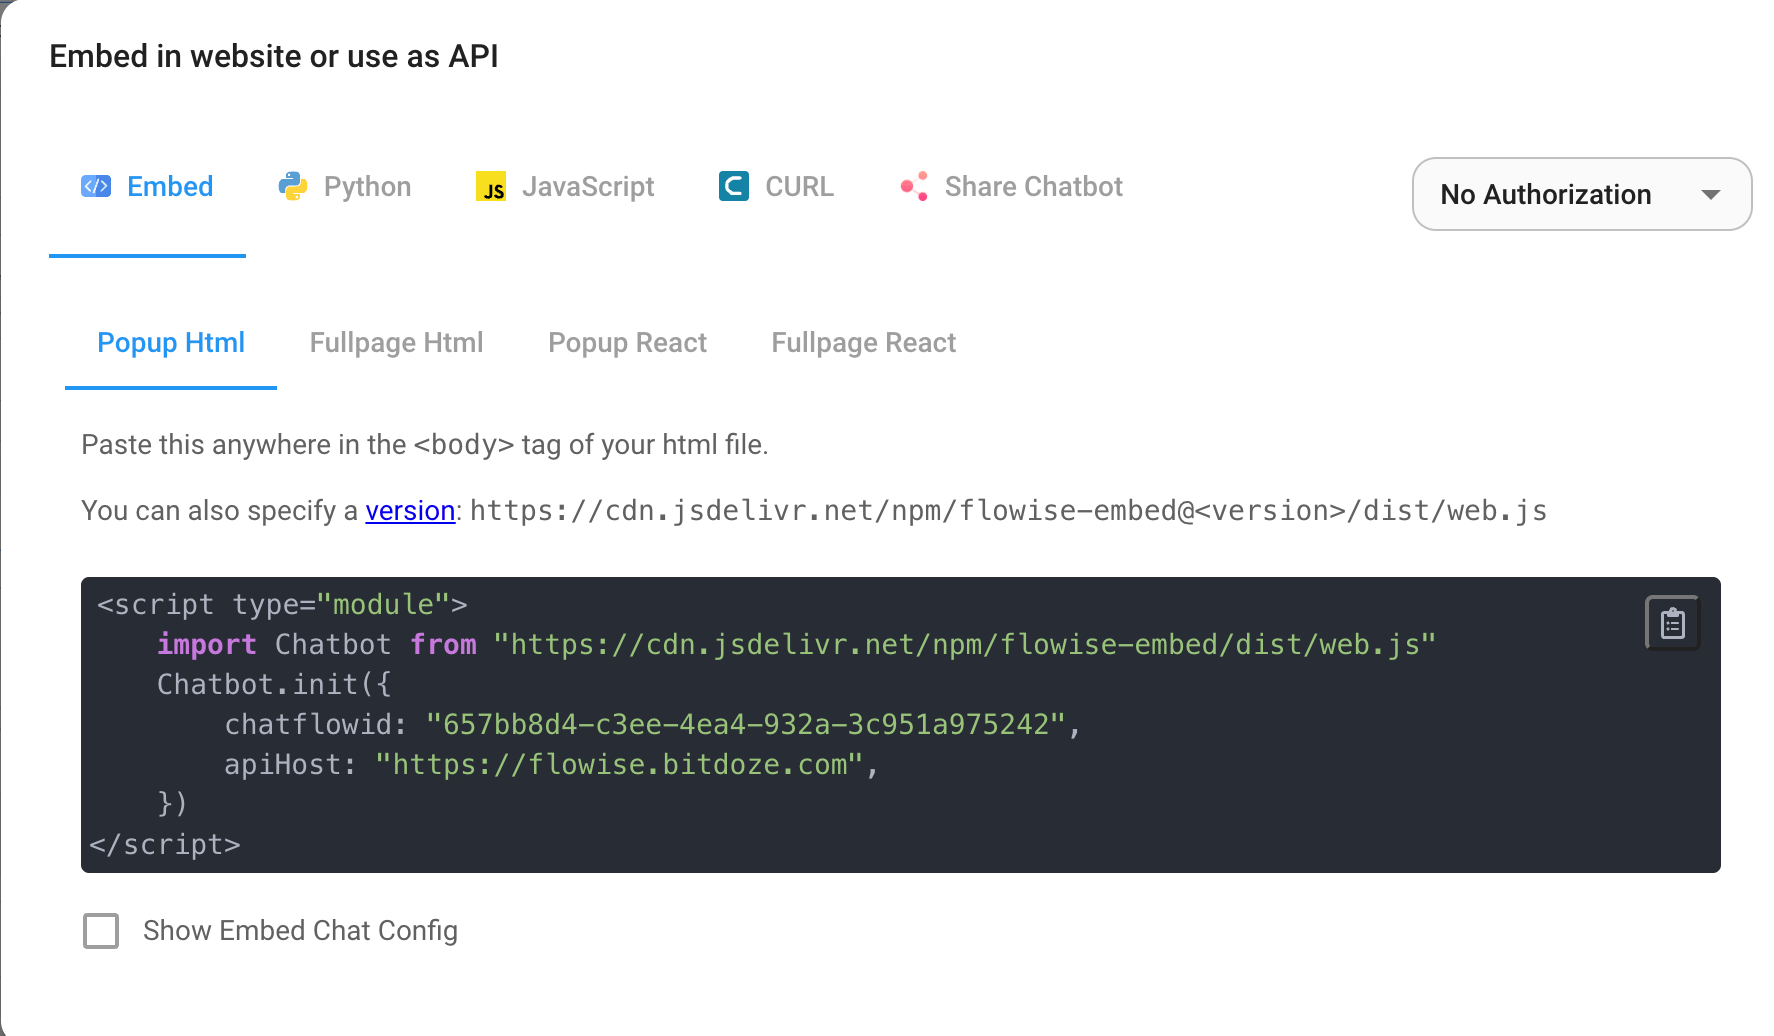
After you finish designing your flow, you can go and use it externally with few options like Embed, Python, JavaScript, CURL or just share it.

Conclusions
By following this guide, you’ve learned how to deploy FlowiseAI to Docker using Docker Compose. You’ve created a Docker Compose file that defines the required services, set up environment variables, and started the FlowiseAI instance. Additionally, you’ve learned how to configure CloudFlare Tunnels to access your FlowiseAI instance securely over the internet.
With FlowiseAI running in Docker, you can easily manage and scale your AI workflows, while taking advantage of Docker’s portability and isolation features. The Docker Compose setup also makes it easy to include additional services, such as a database backup solution, in your deployment.
If you’re interested in exploring more Docker containers for your home server or self-hosted setup, including other AI and productivity tools, check out our comprehensive guide on Best 100+ Docker Containers for Home Server. This resource provides a wealth of options for various applications and services you can run using Docker, helping you build a powerful and versatile self-hosted environment.

