Docmost Docker Compose Install: Self-Hosted Note App for Teams
Learn how you can install Docmost and self host you note taking app for your team with docker and docker compose.
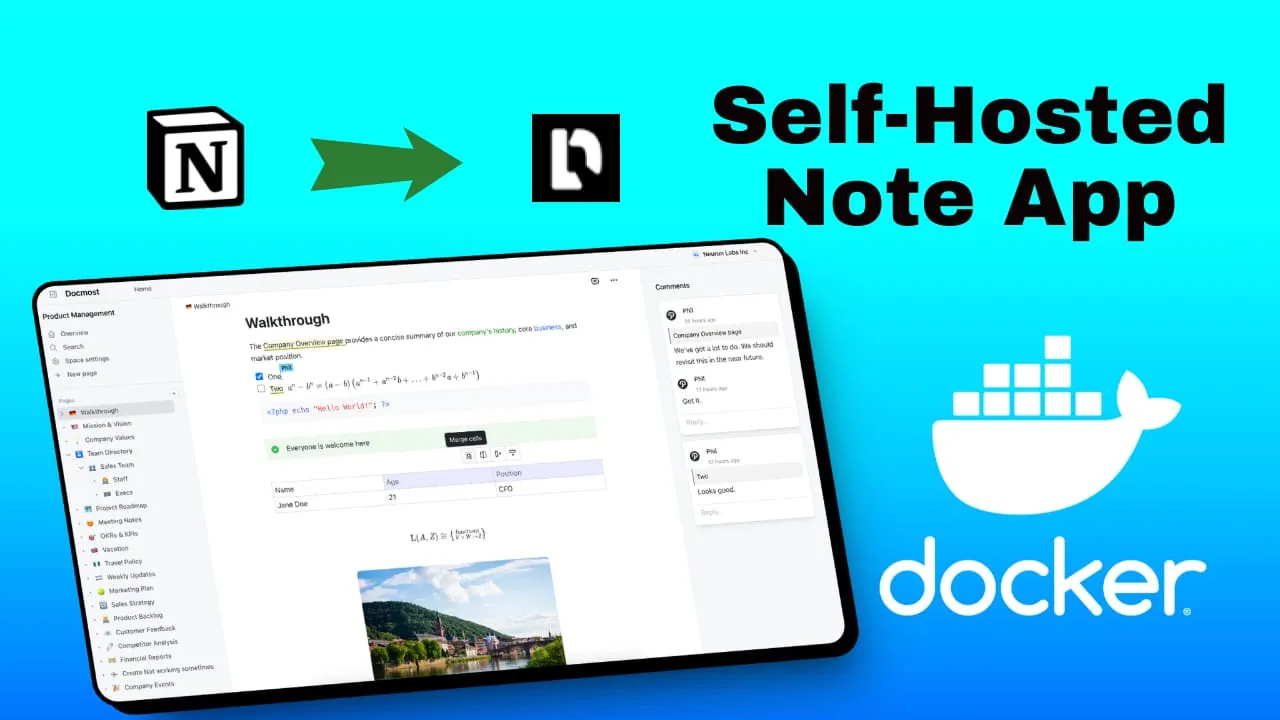
Docmost is an open-source collaborative wiki and documentation software that offers a powerful alternative to popular platforms like Confluence and Notion. Designed for teams and organizations seeking a self-hosted solution for knowledge management, Docmost provides a robust set of features to create, organize, and share information efficiently.
At its core, Docmost offers a user-friendly interface for creating and editing documents, with support for rich text formatting, markdown, and collaborative editing. The platform allows users to structure their content hierarchically, making it easy to navigate through complex information architectures. One of Docmost’s standout features is its ability to create interconnected documents, enabling users to build a comprehensive knowledge base with cross-referencing capabilities.
Docmost supports team collaboration through features like real-time editing, commenting, and version history. This makes it an ideal tool for project documentation, internal wikis, and knowledge sharing within organizations. The platform also offers customizable permissions and access controls, allowing administrators to manage user roles and content visibility effectively.
Another significant advantage of Docmost is its search functionality, which enables users to quickly find relevant information across the entire knowledge base. This is particularly useful for large organizations with extensive documentation.
In case you are interested to monitor server resources like CPU, memory, disk space you can check: How To Monitor Server and Docker Resources
Docmost offers several key features:
-
Real-time collaborative rich-text editor: Multiple users can simultaneously edit pages in real-time, supporting tables, math (LaTeX), and callouts.
-
Spaces: Content can be organized into distinct spaces dedicated to different teams, projects, or departments, providing a structured environment for collaboration.
-
Permissions system: Robust controls allow administrators to manage who can view, edit, and manage content, ensuring information security and proper access.
-
Groups: Users can be organized into groups for unified permissions management, simplifying access control.
-
Comment system: An integrated inline commenting feature allows for meaningful discussions directly on pages.
-
Page History: Users can view the history of changes made to each page, track edits over time, and revert to previous versions if needed.
-
Search functionality: Powered by Postgres full-text search, allowing quick location of information across all pages.
-
Nested pages: Supports page nesting to any level, with drag-and-drop functionality for easy reordering and management.
-
Attachments: Images and videos can be easily attached to pages by pasting from the clipboard, with support for both S3 and local storage drivers.
-
**File attachment: **Users can attach files to pages for easy reference and sharing.
Docmost is designed as an alternative to platforms like Confluence and Notion, offering these features in an open-source package that can be self-hosted. It’s particularly useful for managing wikis, knowledge bases, and documentation for teams and organizations.
If you are looking for other apps for your note taking needs you can check:
Setting Up Docmost with Docker Compose
If you are interested to see some free cool open source self hosted apps you can check toolhunt.net self hosted section.
1. Prerequisites
Before you begin, make sure you have the following prerequisites in place:
- VPS where you can host Docmost, you can use one from Hetzner or use a Mini PC as Home Server
- Docker and Dockge installed on your server, you can check the Dockge - Portainer Alternative for Docker Management for the full tutorial.
- CloudFlare Tunnels are configured for your VPS server, the details are in the article here I deployed Dockge
- OR reverse proxy with CloudPanel you can check: Setup CloudPanel As Reverse Proxy with Docker and Dockge
You can use also Traefik as a reverse proxy for your apps. I have created a full tutorial with Dockge install also to manage your containers on: How to Use Traefik as A Reverse Proxy in Docker
2. Docker Compose File
version: "3"

services:
  docmost:
    image: docmost/docmost:latest
    container_name: docmost
    hostname: docmost
    user: root
    healthcheck:
      test: timeout 10s bash -c ':> /dev/tcp/127.0.0.1/3000' || exit 1
      interval: 10s
      timeout: 5s
      retries: 3
      start_period: 90s
    depends_on:
      - docmost-db
      - docmost-redis
    environment:
      APP_URL: "${APP_URL}"
      APP_SECRET: "${APP_SECRET}"
      DATABASE_URL: "postgresql://${POSTGRES_USER}:${POSTGRES_PASSWORD}@docmost-db:5432/${POSTGRES_DB}?schema=public"
      REDIS_URL: "redis://docmost-redis:6379"
    ports:
      - "5031:3000"
    restart: unless-stopped
    volumes:
      - ./docmost:/app/data/storage

  docmost-db:
    image: postgres:16-alpine
    container_name: docmost-DB
    hostname: docmost-db
    healthcheck:
      test: ["CMD-SHELL", "pg_isready -U ${POSTGRES_USER} -d ${POSTGRES_DB}"]
      interval: 5s
      timeout: 5s
      retries: 5
    volumes:
      - ./docmost-db:/var/lib/postgresql/data:rw
    environment:
      POSTGRES_DB: ${POSTGRES_DB}
      POSTGRES_USER: ${POSTGRES_USER}
      POSTGRES_PASSWORD: ${POSTGRES_PASSWORD}
    restart: on-failure:5

  docmost-redis:
    image: redis:7.2-alpine
    container_name: docmost-redis
    hostname: docmost-redis
    restart: unless-stopped
    healthcheck:
      test: ["CMD-SHELL", "redis-cli ping || exit 1"]
    volumes:
      - ./redis_data:/data
This Docker Compose file defines three services: docmost (the main application), docmost-db (PostgreSQL database), and docmost-redis (Redis cache).
docmostservice:
- Uses the latest Docmost image
- Sets up a healthcheck to ensure the application is running
- Depends on the database and Redis services
- Configures environment variables for the application
- Maps port 5031 on the host to port 3000 in the container
- Mounts a volume for data storage
docmost-dbservice:
- Uses PostgreSQL 16 Alpine image
- Sets up a healthcheck for the database
- Configures environment variables for the database
- Mounts a volume for persistent data storage
docmost-redisservice:
- Uses Redis 7.2 Alpine image
- Sets up a healthcheck for Redis
- Mounts a volume for data persistence
3. Docmost .env file
The .env file contains environment variables used by the Docker Compose configuration:
APP_URL=docs.bitdoze.com
POSTGRES_DB=docmost
POSTGRES_USER=docmost
POSTGRES_PASSWORD=docmost
APP_SECRET='9Qyodnm1R7IYjVi7kKKL57pdlkDwkNK+dut3i8xRAZI='APP_URL:The URL where Docmost will be accessiblePOSTGRES_DB, POSTGRES_USER, POSTGRES_PASSWORD: Database configurationAPP_SECRET: A secret key for the application (should be randomly generated)
To generate a secure APP_SECRET, use the command:
openssl rand -base644. Enhancing Docmost with SMTP
You can add SMTP tou your Docmost instalation you just need to add your environment for docker compose file and add the passwords in .env file, Docmost doc can be checked for more.
# Email Configuration
MAIL_DRIVER=smtp
SMTP_HOST=smtp.example.com
SMTP_PORT=587
SMTP_USERNAME=your_username
SMTP_PASSWORD=your_password
MAIL_FROM_ADDRESS=[email protected]
MAIL_FROM_NAME=Docmost
5. Deploying the Docker Compose File for Docmost
Once you have your Docker Compose and .env files set up, deploying Docmost is straightforward. Simply run the following command in the directory containing your Docker Compose file:
docker-compose up -dThis command will:
- Pull the necessary Docker images if they’re not already present on your system.
- Create and start the containers defined in your Docker Compose file.
- Run the containers in detached mode (-d), allowing them to run in the background.
After running this command, you should see output indicating that the containers are being created and started. Once complete, you can verify that the containers are running with:
docker-compose psThis will show you the status of your Docmost and PostgreSQL containers.
6. Implementing SSL with CloudFlare Tunnels for Docmost
CloudFlare Tunnels offer a innovative solution for securely connecting your web applications to the internet without the need for public IP addresses or opening inbound ports on your firewall. This service, part of CloudFlare’s suite of security and performance tools, provides a secure tunnel between your origin server and CloudFlare’s edge network.
CloudFlare Tunnels operate on a simple yet powerful principle:
- Outbound Connection: Your server initiates an outbound connection to CloudFlare’s network using the CloudFlare daemon (cloudflared).
- Tunnel Creation: This connection establishes a secure tunnel between your origin and CloudFlare’s edge.
- Traffic Routing: Incoming requests to your domain are routed through this tunnel to your origin server.
- Response Delivery: Responses from your server are sent back through the tunnel and delivered to the user.
This process effectively eliminates the need for traditional port forwarding or firewall configuration, as all traffic flows through the secure tunnel.
Go in Access - Tunnels and choose the tunnel you created and add a hostname that will link a domain or subdomain and the service and port.

You can also check Setup CloudPanel as Reverse Proxy with Docker and Dokge to use CloudPanel as a reverse proxy to your Docker containers or How to Use Traefik as A Reverse Proxy in Docker.
7. Accessing The DocMost UI
The you can go and access Docmost with your APP_URL that yu have set, you will be promted to create a username and password at beginning.
Conclusion
Deploying Docmost using Docker Compose offers a robust and efficient way to set up a self-hosted documentation and collaboration platform.
By following this guide, you’ve successfully set up a powerful, self-hosted documentation platform that offers the benefits of popular commercial solutions while maintaining full control over your data and infrastructure. Docmost, deployed through Docker Compose, provides a solid foundation for efficient knowledge management and collaboration within your organization.
For more Docker containers that can enhance your self-hosted setup, including other productivity and collaboration tools, don’t forget to check out our guide on Best 100+ Docker Containers for Home Server. This comprehensive list can help you discover additional applications to complement your Docmost installation and further improve your team’s productivity.
