How To Deploy Uptime Kuma With One Click
Learn how to deploy Uptime Kuma with 1 click in docker via Coolify.

Uptime Kuma is an open source monitoring tool that you can install on your VPS via Docker. Uptime Kuma will help you monitor your website and send alerts when it is down. In this tutorial, we will see how we can install it via Coolify with just 1 click.
If you don’t know, Coolify is a self-hosted Heroku or Netlify alternative that also allows you to deploy various Docker apps. For more details you can check out: Coolify Install A Free Heroku and Netlify Self-Hosted Alternative where we go into more detail.
1. Deploy A VPS server
To host Uptime Kume in a Docker container you need a VPS server, there are a lot of services that can help you with this, the most known are DigitalOcean, Vultr, Hetzner, I also wrote an article and made a video with the benchmarks here: DigitalOcean vs Vultr vs Hetzner you can check it out.
In this tutorial, we are going to use Hetzner for this where we have the VPS created and we can ssh to it to have Coolify installed and then deploy Uptime Kuma.
DigitalOcean $100 Free Vultr $100 Free Hetzner €20 Free2. Installing Coolify
Coolify can be installed with a simple command, you can also check my tutorial for complete steps including the SSL certificate: Coolify Install
We will install Coolify on a Ubuntu 22.04 server. To do this, you just need to SSH to the VPS server and run the following command
wget -q https://get.coollabs.io/coolify/install.sh \
-O install.sh; sudo bash ./install.sh
If you are interested to see some free cool open source self hosted apps you can check toolhunt.net self hosted section.
If you are interested in how to monitor your CPU and have an automatic email sent when the load is too high, you should have a look at Monitor CPU Usage and Send Email Alerts in Linux
🎥 Uptime Kuma Video with Deployment
3. Deploy the Uptime Kuma service with Coolify
3.1 Point Domain or Subdomain to VPS
We need a domain or subdomain that we can use to access Uptime Kuma, in this tutorial we are going to use CloudFlare and point a subdomain to the VPS server where we have Coolify installed. We will not be using the CloudFlare proxy and will leave it disabled. All you need to do is add an A record and point it to the server IP.
3.2 Create a service
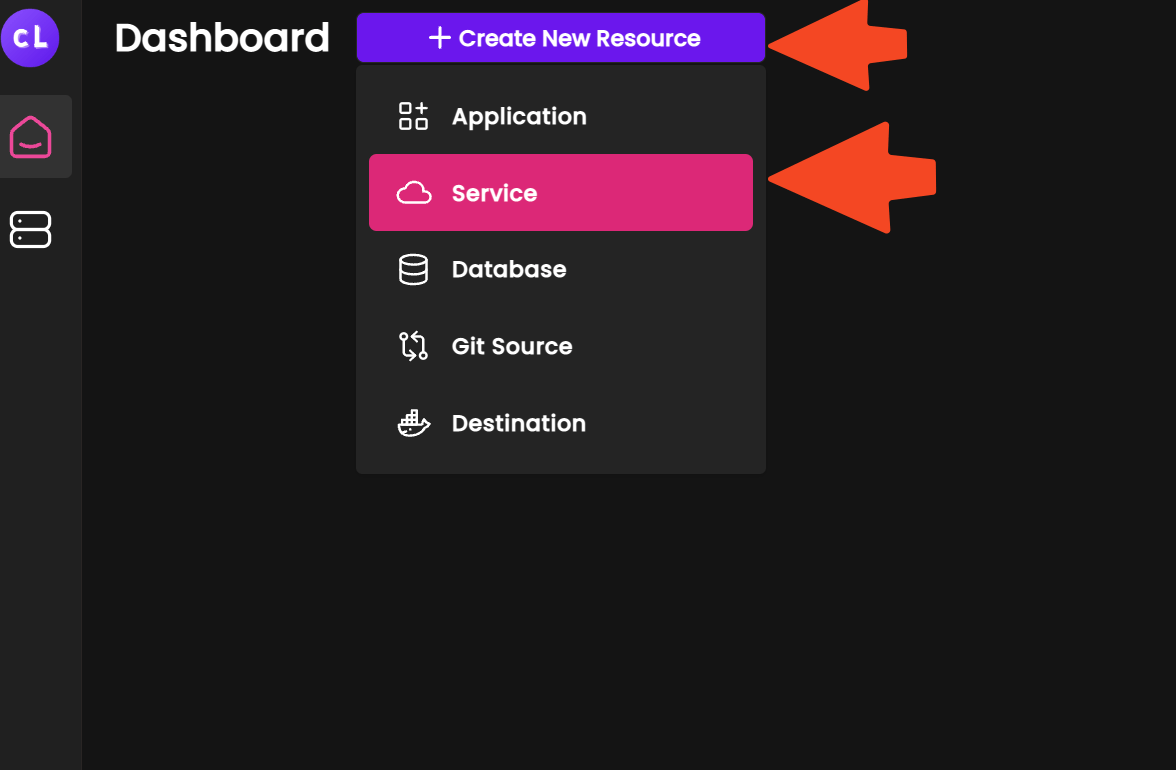
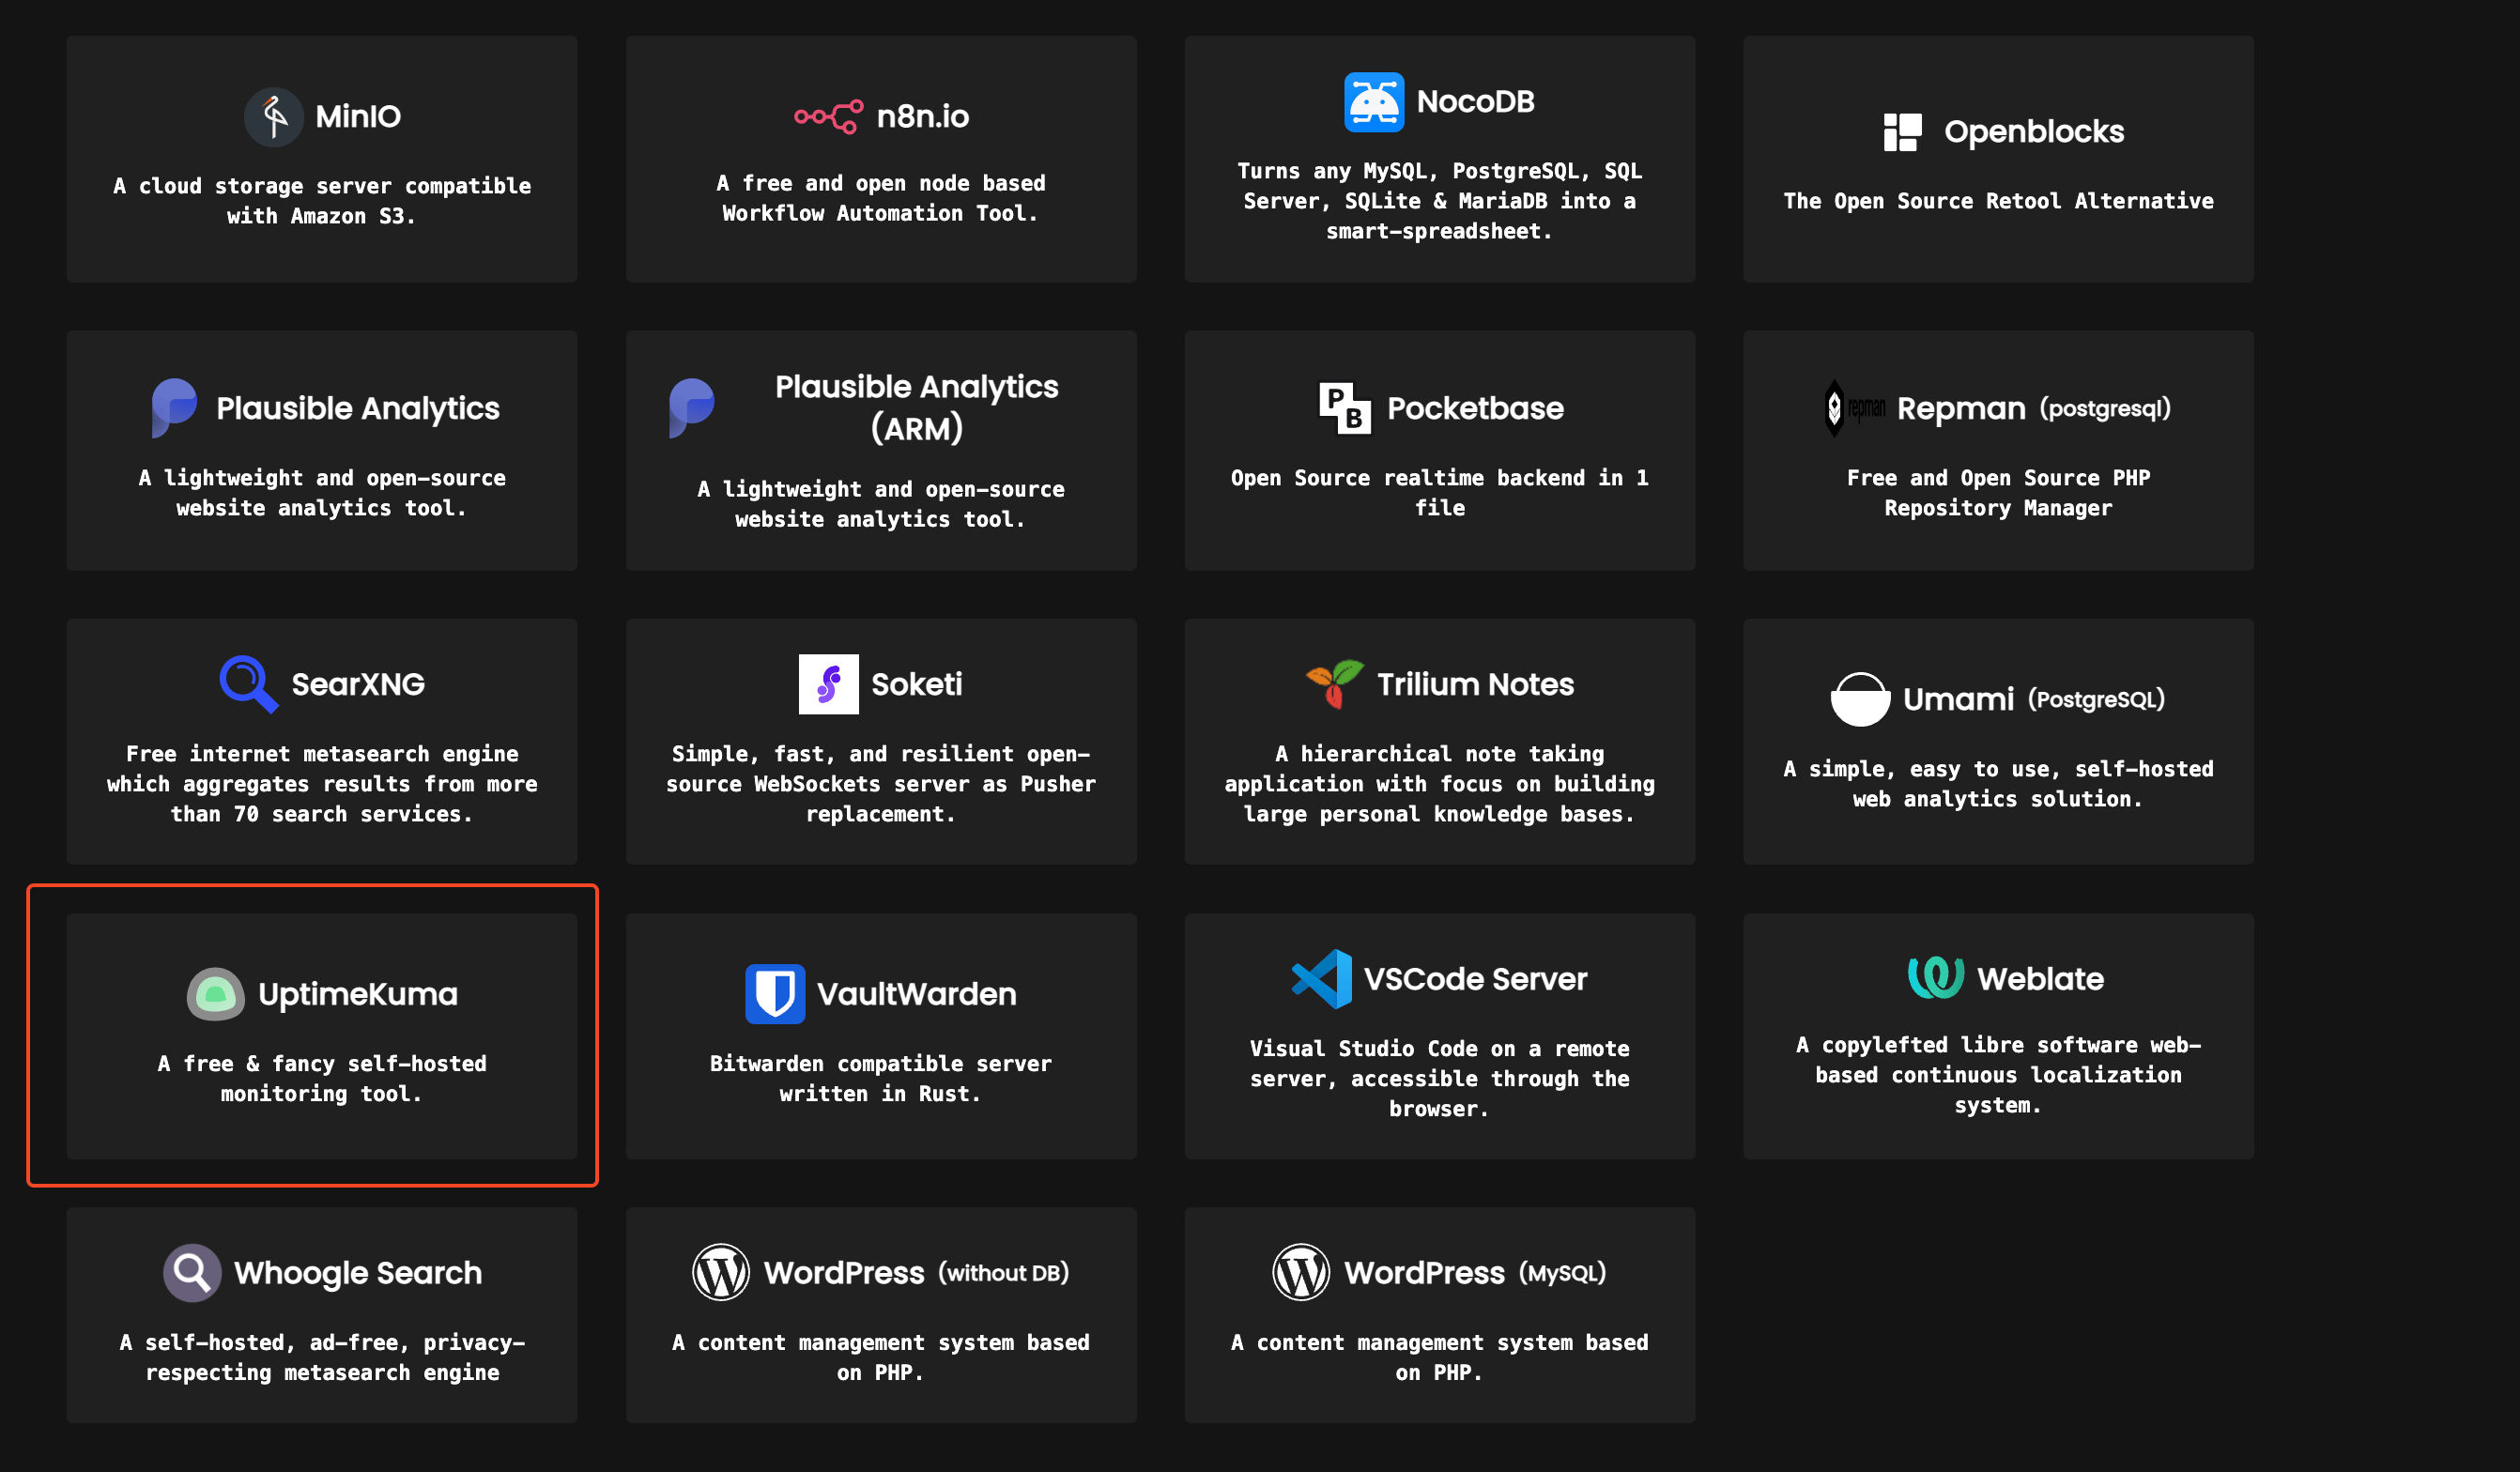
You need to go to Create New Resource and select Service. From there select the UptimeKuma service as shown in the images below:


3.3 Configure Coolify Uptime Kuma
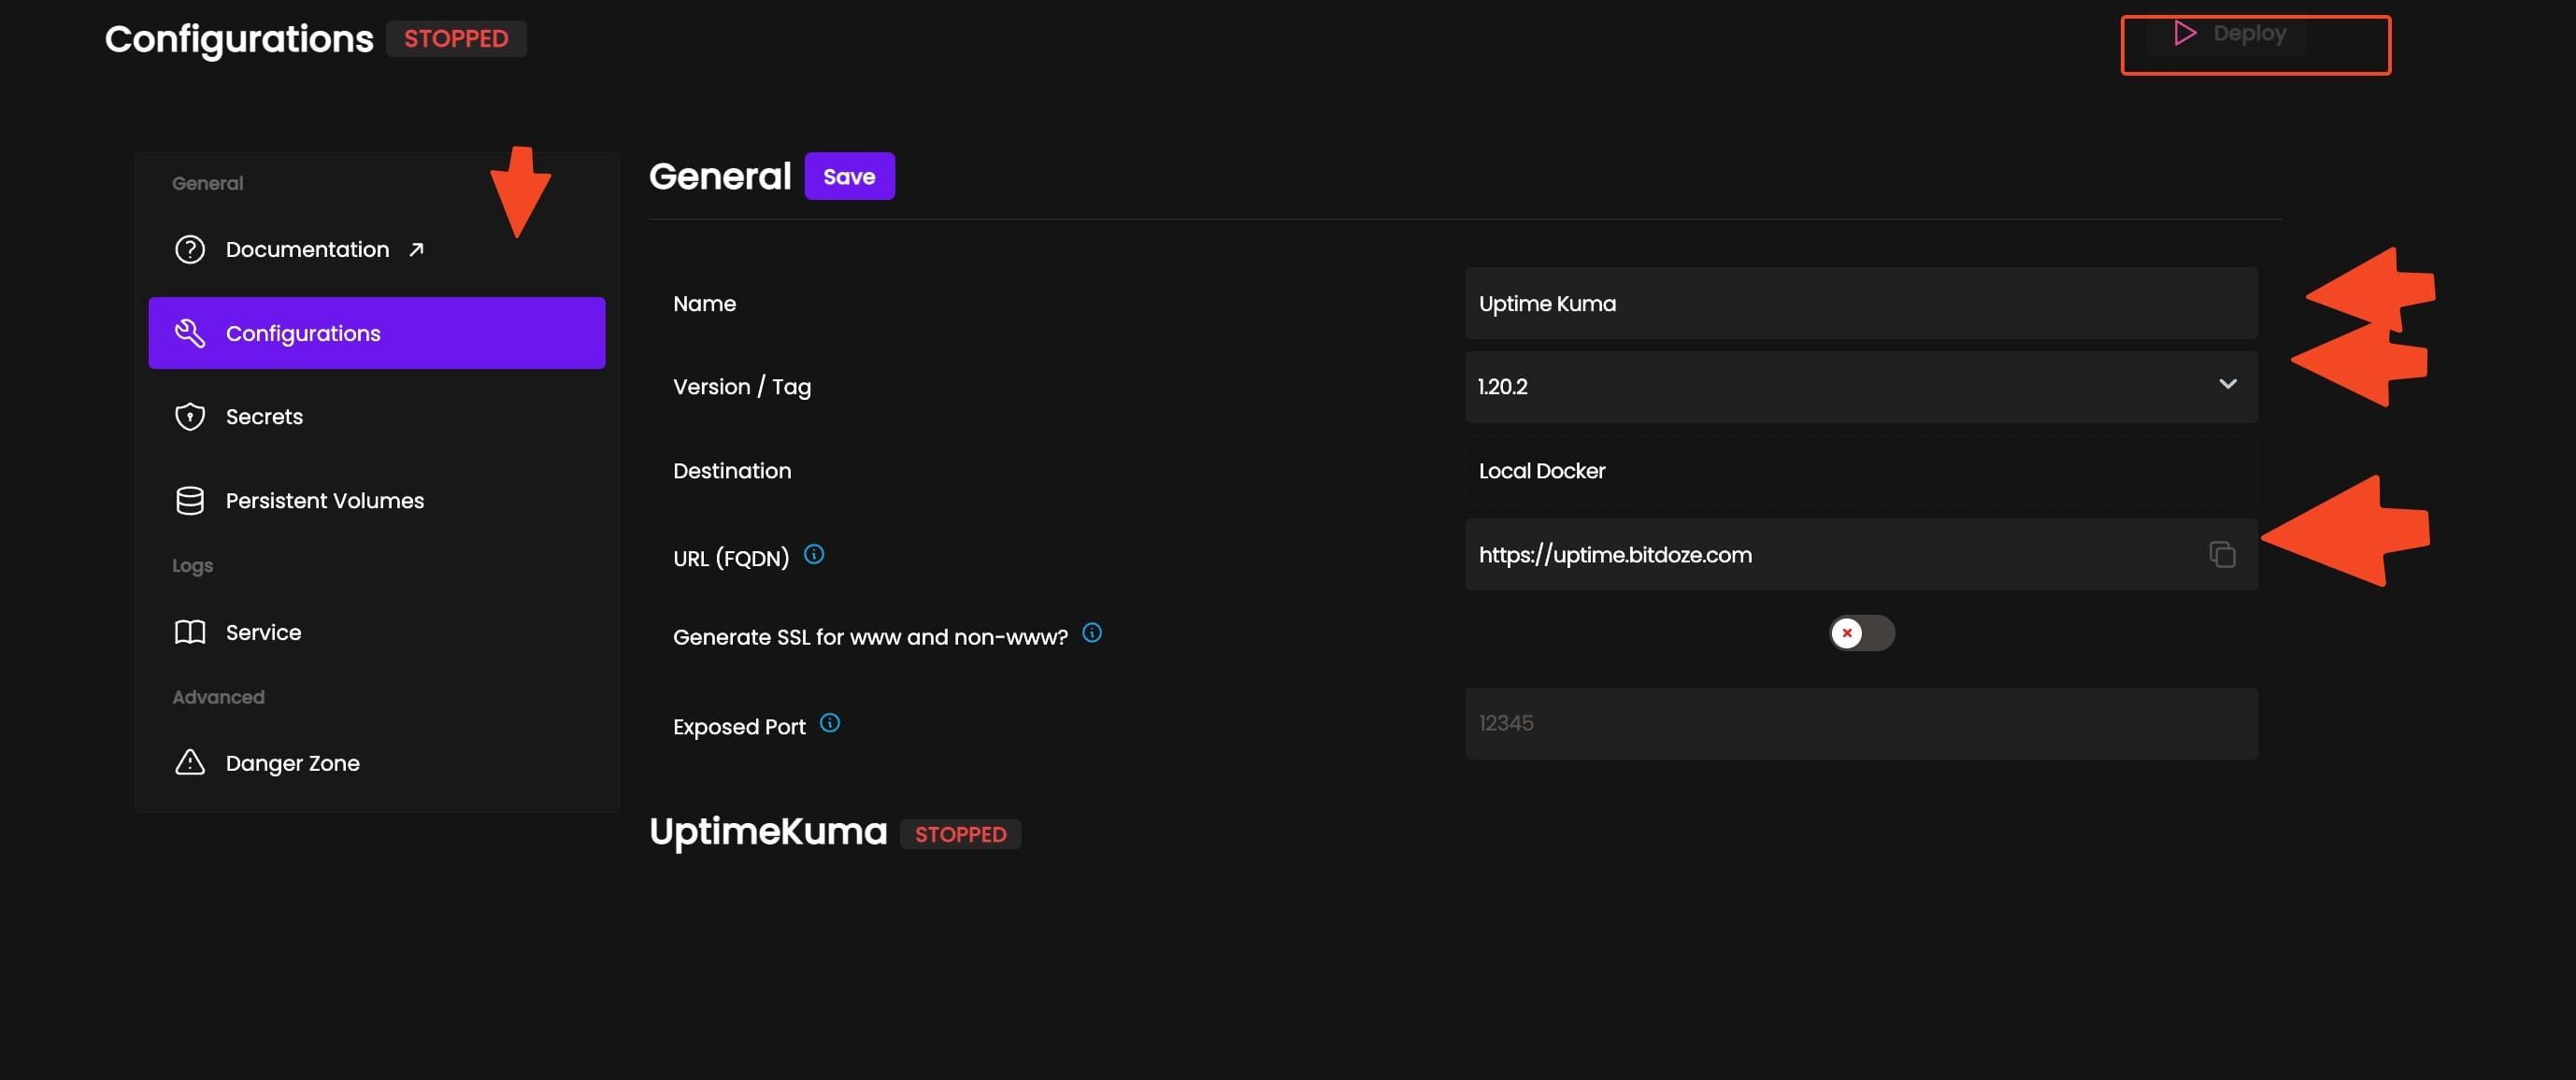
The next thing on the list is to configure the Coolify service, in there you need to add the below:
- Name - here you add the name of your deployment
- Version / Tag - you choose the Uptime Kuma version you want to install
- URL (FQDN) - you add the domain or sudomain that you want to use

After what needs to be done is to hit Save and Deploy button.
3.4 Access Uptime Kuma
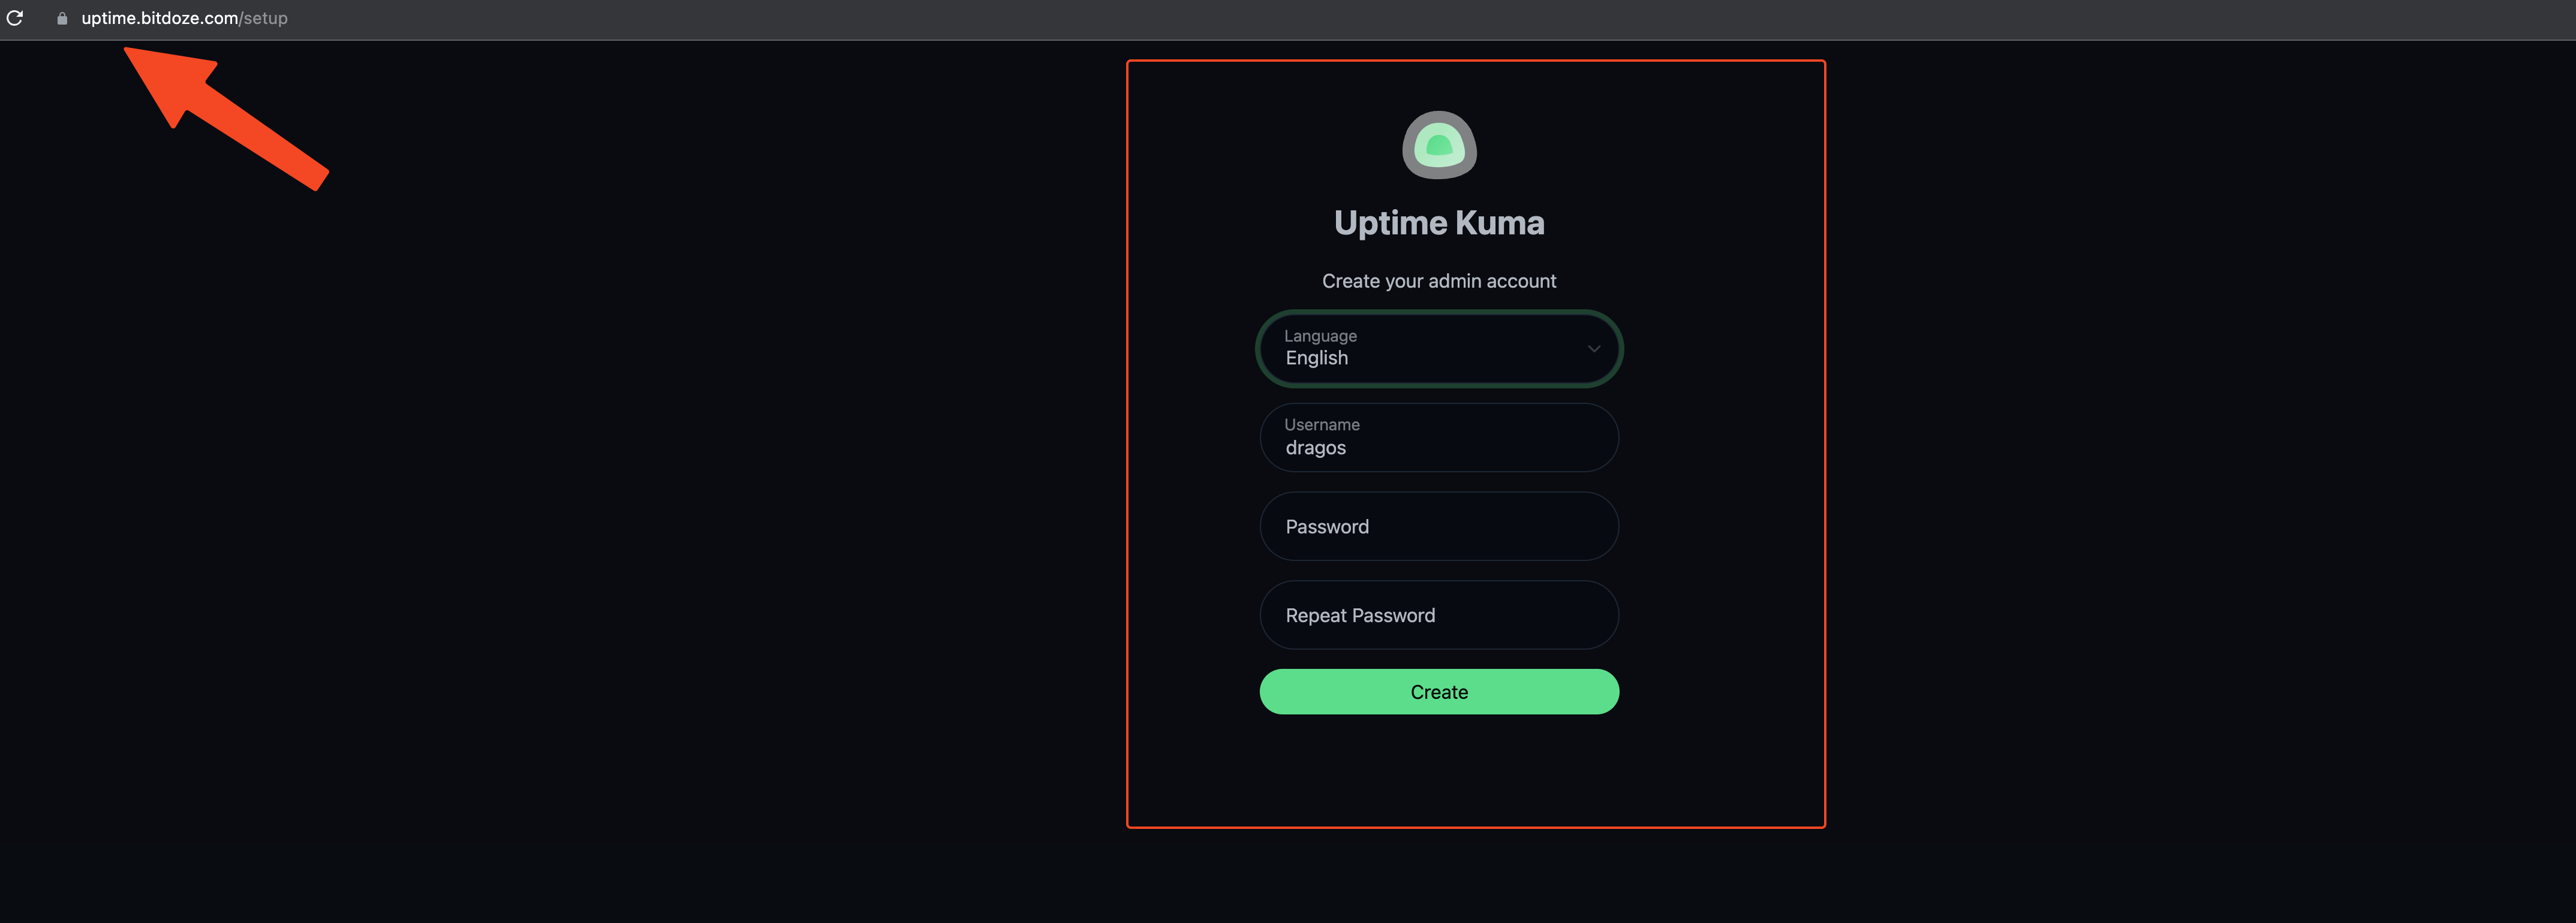
After deploy is finished you should go and access Uptime Kuma dashboard with the URL you have added in the configs. The first time you will be prompted to create a user and a password.

After you create the account you can add your website that needs to be monitored and configure the notifications. The configs will be stored on the disks with docker volums and in case you redeploy it you will not lose any data.
Conclusions
This is how you can easely deploy Uptime Kuma with the help off Coolify, the config has everything that it needs and you can access it securely with an SSL certificate.
Related Posts

Convert Images to SVG Free With Vectorizer.ai
Convert PNG, JPEG images to SVG easily online for free with Vectorizer.ai

How to Install Node.js using NVM on MacOS and Ubuntu
Tutorial of how Node.js can be installed on MacOS and Ubuntu to start your node projects.

How to Build a One Page Website on a Budget
Learn how to create and host a one page website on a budget using Astro, static WordPress, or Carrd. These options are fast, simple, and cost-effective.