How To Deploy Static Website Astro.JS on VPS Servers
Learn how to deploy a node.js static website Astro on a VPS server easily.

There are a lot of free options where you can deploy Astro.js websites like CloudFlare Pages, Vercel, or Netlify all of them for free but with some limitations.
I have even created a tutorial of how you can deploy astro.js on CloudFlare Pages but you may want to use your own VPS server for it to not reach the limits of a free solution.
In this tutorial we are going to see how you can deploy an astro.js blog or any website on your own VPS server, you can use any VPS provider you want, the most known are DigitalOcean, Vultr, Hetzner, I have also written an article and made a video with the benchmarks here: DigitalOcean vs Vultr vs Hetzner you can check it out.
To deploy Astro in this tutorial we will need to have the VPS server created and have CloudPanel installed, if you don’t know CloudPanel is a hosting panel that can help you host different websites from PHP ones to Node.JS ones to static ones. It is fast and can help you manage your VPS easily, you can check the Install CloudPanel and Host Node.js Apps to see exactly how you can install it.
DigitalOcean $100 Free Vultr $100 Free Hetzner €20 FreeIf you are interested on how you can monitor your CPU and have an automatic email sent when load is to big you should check: Monitor CPU Usage and Send Email Alerts in Linux
In case you are interested to monitor server resources like CPU, memory, disk space you can check: How To Monitor Server and Docker Resources
Video With Astro.JS Deployment on VPS
You can check this tutorial showing how you can deploy Astro on your VPS with a Heroko or Netlify alternative Coolify: Coolify Install A Free Heroku and Netlify Self-Hosted Alternative or How to Deploy Astro on Your VPS with EasyPanel
Deploy Astro.JS on Your VPS With CloudPanel
Let’s get into this tutorial and see how we can have our website deployed on a VPS server.
1. Add The Website to CloudPanel
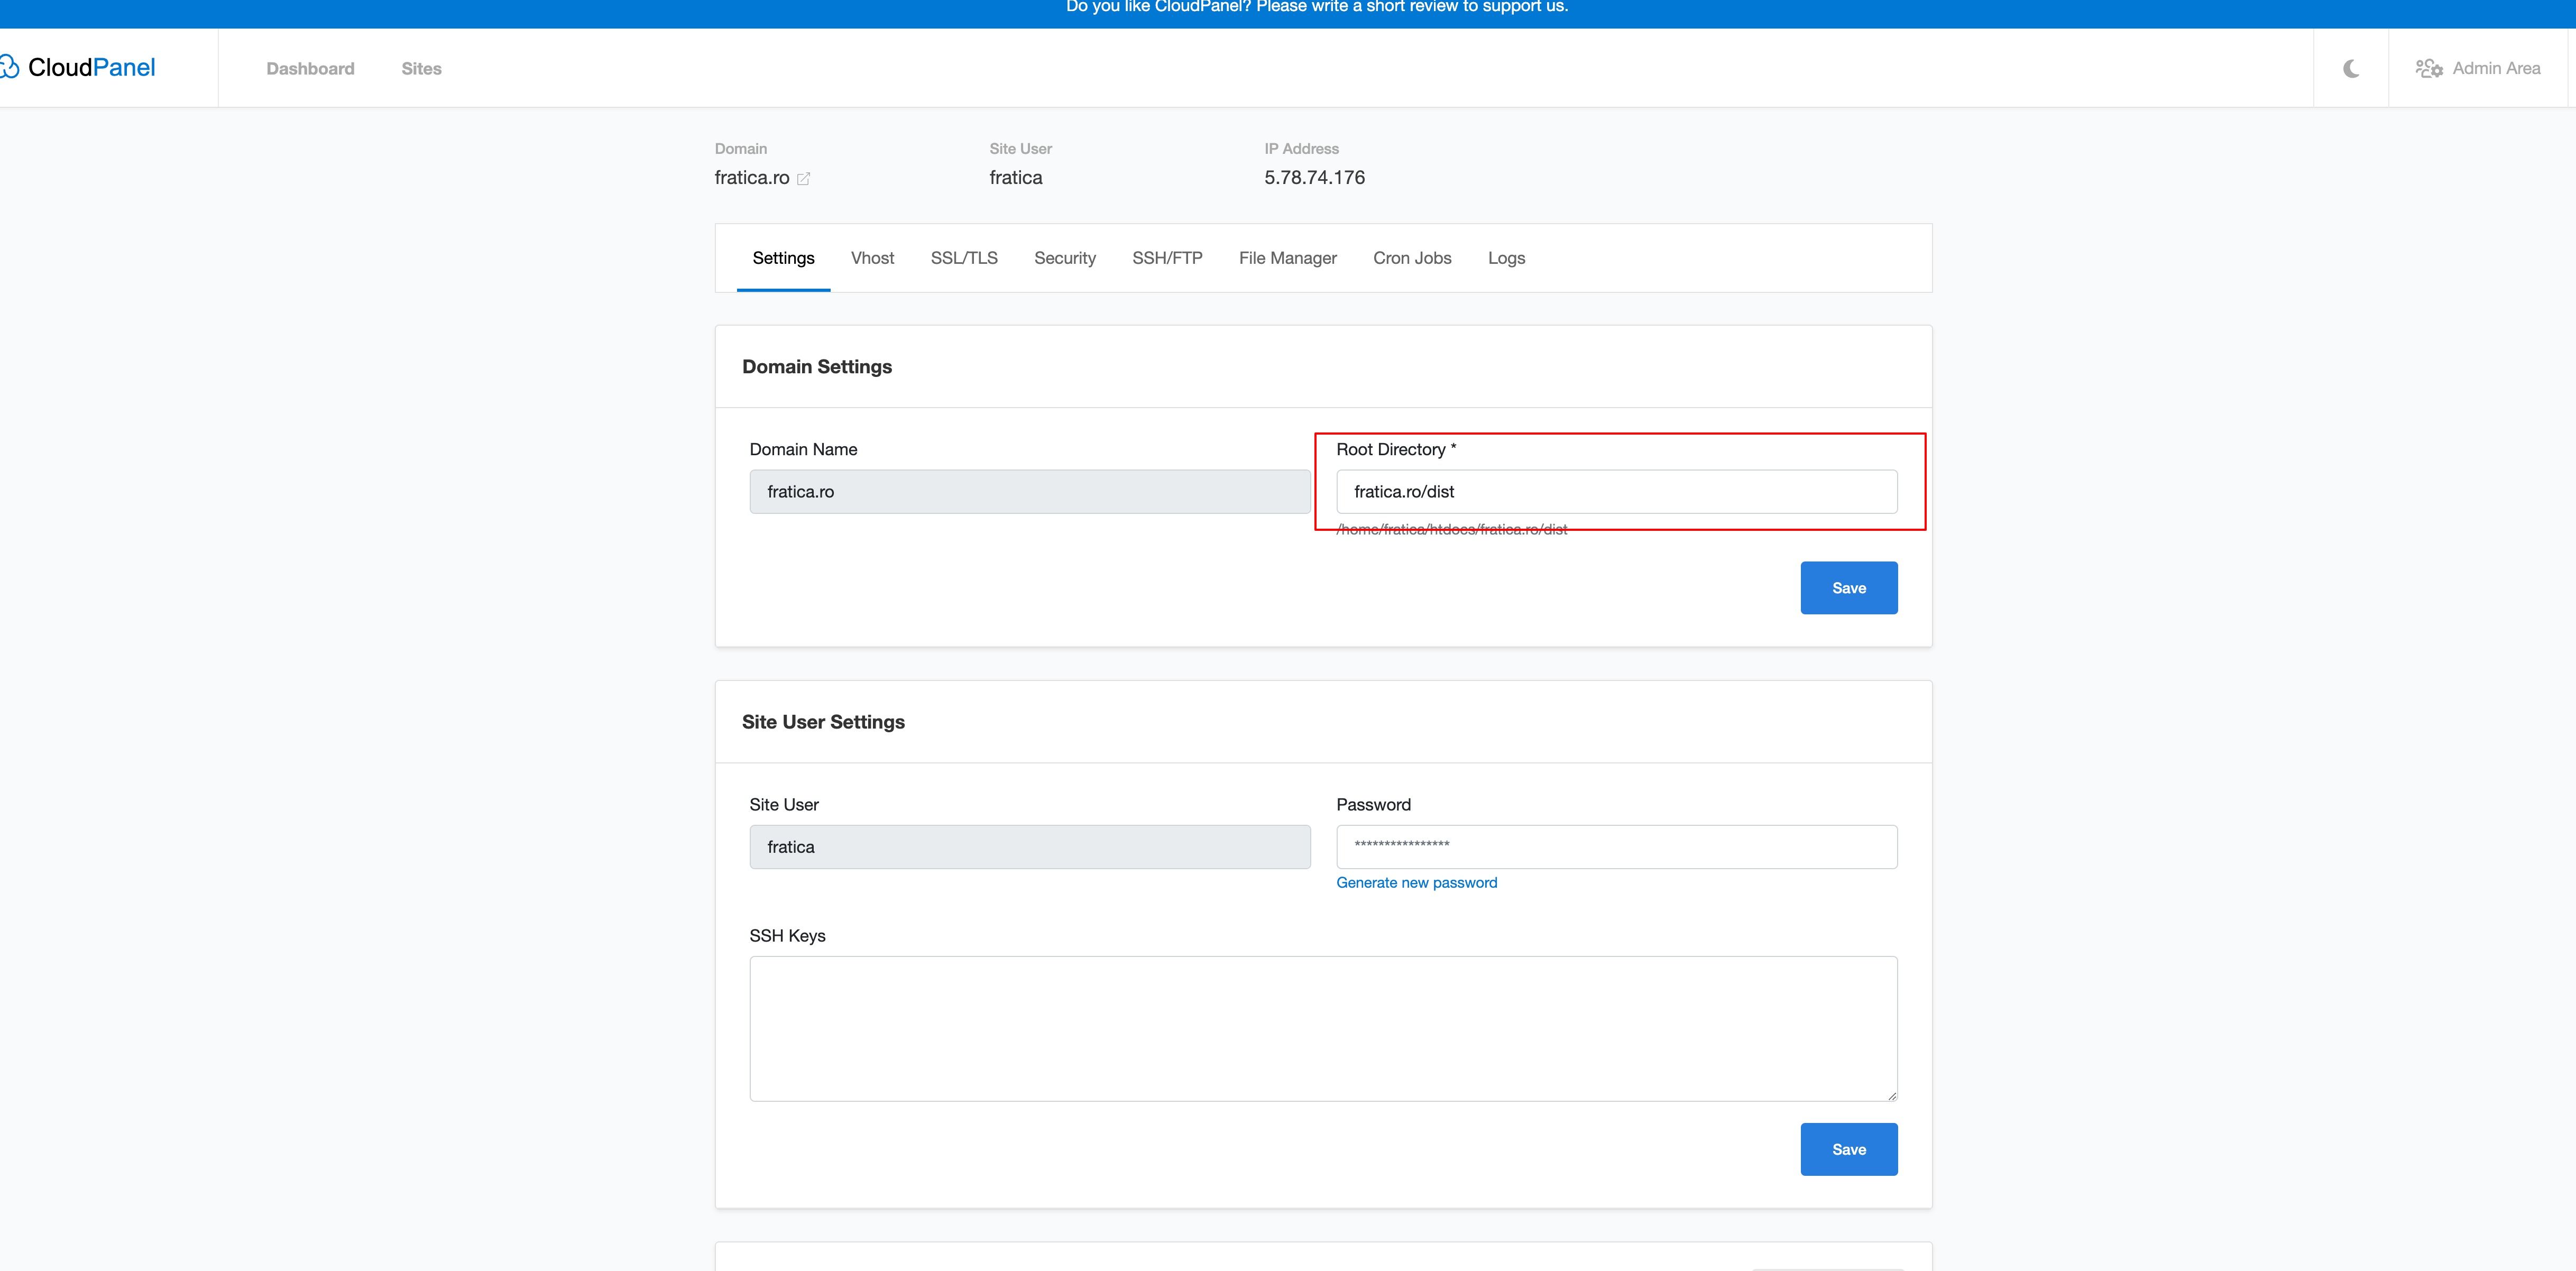
The first step is to go and add the website to CloudPanel, you just go and hit the Add Site and choose the static site option, you need to add your website URL with the website user and password.
After you need to go and edit the root directory to point to www.domain.com/dist the dist directory is used by Astro to deploy the static content when you build it. Check the below picture:

2. Point the Website DNS to the server IP
The next thing to do is to go and point the A record of the domain to your server IP, I am doing this in CloudFlare and I have also activated the proxy for this domain.

3. Generate an SSL Certificate for the Website
This is done from the CloudPanel SSL/TLS interface you just need to go there on the website and hit the new Let’s Encrypt Certificate.
Now the website will have its certificate and can be accessed over HTTPS.
4. Install Node.js on your website user
Astro is using node.js so we need to have node.js working on the user used for the website for this you just need to follow the below steps, also the Install Node.js using NVM on MacOS and Ubuntu can help you:
Login with SSH to the VPS server and go under the user used for the website:
ssh -i <key> root@serverip
sudo su - <website_user>
Install NVM:
curl https://raw.githubusercontent.com/creationix/nvm/master/install.sh | bash
source ~/.bashrc
Install Node.js:
nvm install --lts5. Remove the current website to add a new one with Astro:
cd htdocs
rm -rf www.domain.com6. Add an Astro Website
Add the Astro website, if you have a GitHub repo you can use the Link GitHub with A SSH Key for more details. In this article, I will add a clean Astro website Be sure to know Where would you like to create your new project? to add the exact folder with the domain name you deleted.
7. Build your website
After you make the modifications you can build your website:
npm run astro buildConclusions
This is the easiest way to host astro.js on your own VPS, this can be used on any static website you just need to add the proper destination folder for your static website.
Using CloudFlare on the website will assure that will be fast and can be secured with additional security rules.
DigitalOcean $100 Free Vultr $100 Free Hetzner €20 FreeIn case you are interested to have a web panel that can help you manage your applications and be used as a reverse proxy you can check the bellow course:
CloudPanel Setup Course

